

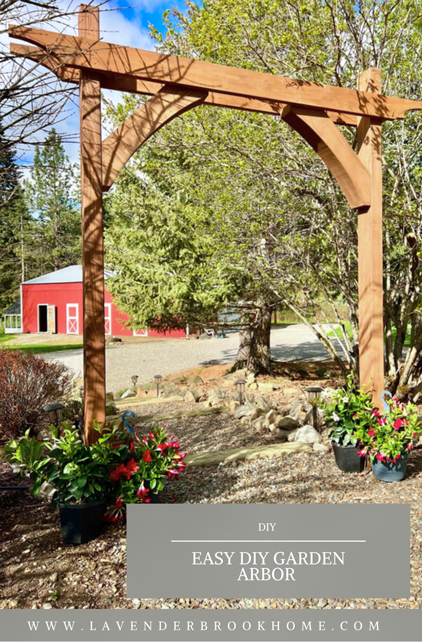
Do-It-Yourself Garden Arbor
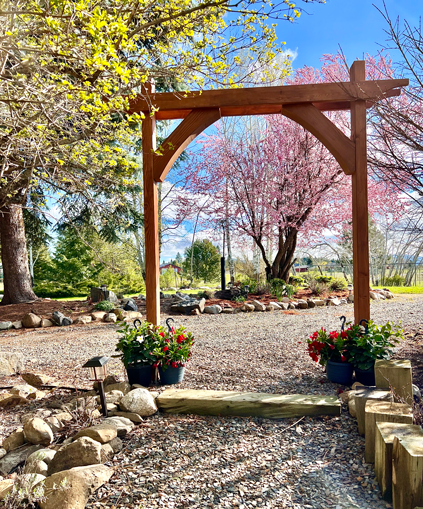
Garden arbors are a beautiful way to frame a garden path or add architecture to garden spaces. However, they are often expensive or cheaply made when custom ordered or pre-built. As luck would have it, our simple two-post design is a great solution. Join us as we build a beginner-level easy DIY garden arbor in four easy steps.
The Beauty of A Garden Arbor
Enchanted garden spaces draw us into them in magical ways. It is awe-inspiring to step through the wonder of a garden and experience a deep and divine emotional attachment to the natural world.
Historically, garden arbors separated spaces and added visual interest to gardens. Specifically, arbors adorned with vining plants created areas tucked away from the sun. Today, they frame a pretty garden view, dress up a path, provide architectural interest to gardens, and add a grand focal point. Of course, sitting under an arbor and enjoying the shade and peace of nature on a sunny day might be one of the best ways to enjoy a garden arbor.

Building an Easy DIY Garden Arbor
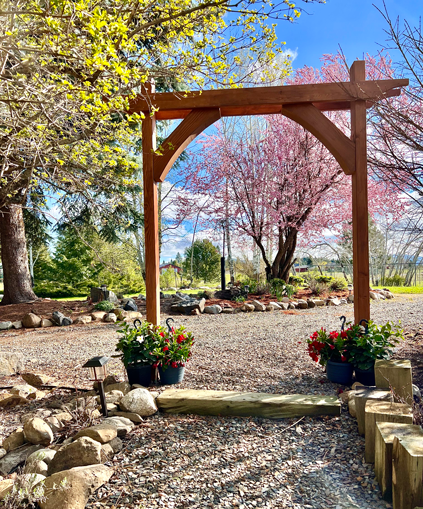
Building a garden arbor is not necessarily complicated. It requires a few simple tools and some basic lumber materials. Moreover, the build requires basic beginner skills but can be customized with creativity and higher skill sets. Hence, we were able to build our arbor in about a half-day. The result is a lovely framed view on our garden path with charming dappled shade and architecturally beautiful support for a canopy of climbing plants.
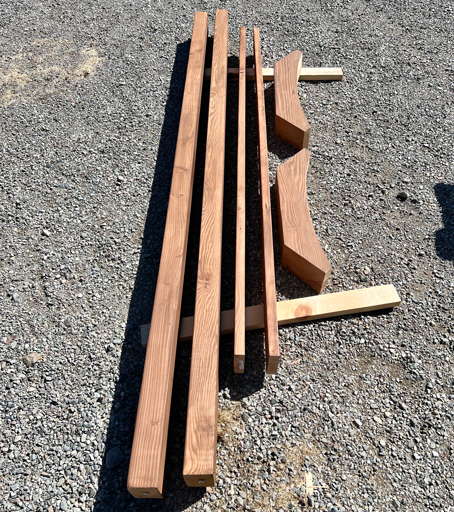
Materials:
- 2 – 6 x 6 posts
- 2 – 2 x 6 boards
- optional diagonal corbels: cut from 2- 6 x 6 boards or 2 – 2 x 6 boards (decorative corner brackets also an option)
- concrete
- stain or protective sealer
Tools:
- jigsaw & blade (bandsaw if cutting 6 x 6 corbels)
- tape measure
- miter saw (or circular saw)
- square
- level
- drill/driver compact
- 5-inch ledger wood screws or bolts (long enough to go through the 6-inch post to attach the 6-inch corbel)
- 2 1/2″ x 9 exterior screws
- post hole digger or shovel
Choosing Arbor Materials
To begin, choose the appropriate materials. The most reliable and long-lasting woods for outdoor projects are rot-resistant. Therefore, cedar, redwood, and pressure-treated pine make excellent options. In this incident, we chose to use pine. We stained it with a protective outdoor stain to ensure a long-lasting product in our four-season climate. In our case, the arbor posts will secure in the ground with concrete.
Setting the Arbor Posts
Typically, the next step is to set the posts in the concrete (we built our arbor ahead of time on the lawn because of our unique space limitations). Beforehand, you’ll dig two holes separated by the length of space you desire for the arbor opening. In our case, this was about 68” or a little over 4 feet in width.
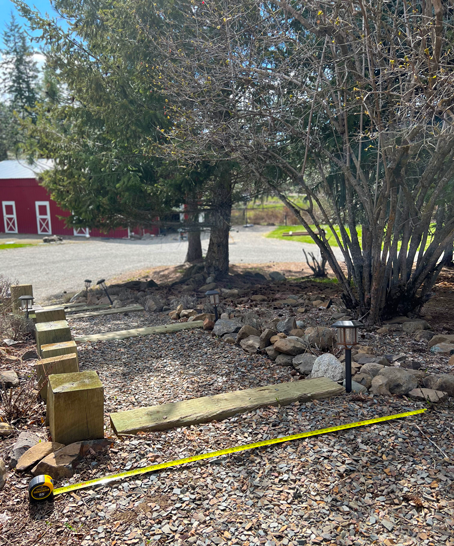
It’s best to dig your holes at a minimum of 2 feet deep. Indeed, large posts will require deeper holes and more concrete support. Subsequently, we set our holes at about 18 inches for our 6 X 6 posts.
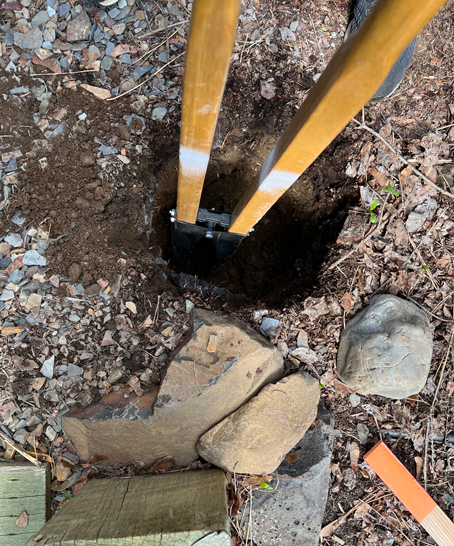
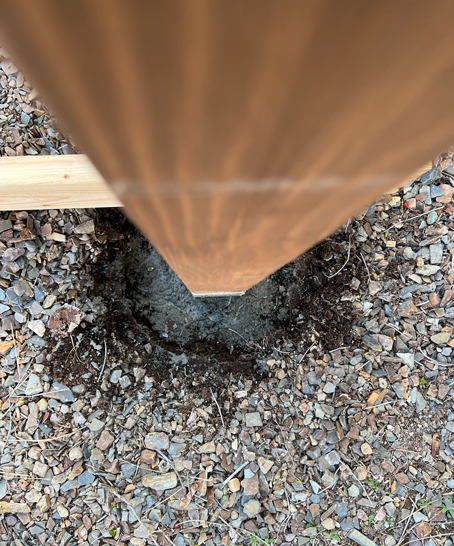
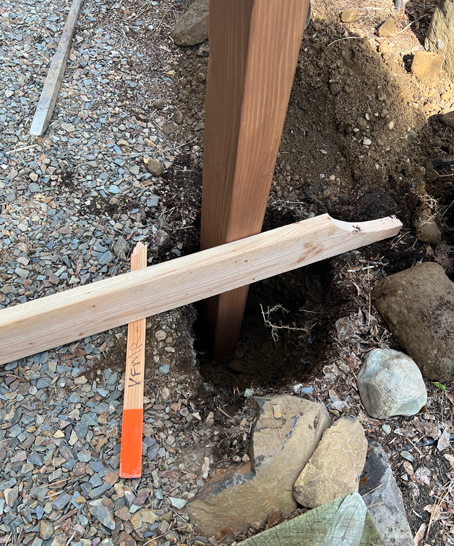
Next, set the posts in the holes and ensure they are the same height by measuring. Once the vertical posts are set to the same height, mix and pour concrete into the holes around them. Continue to fill the cavern until the concrete reaches about a ½ inch from the surface. Finally, level the posts vertically.
Our posts were having trouble staying in place, so we attached a brace at the bottom until the concrete was entirely cured. Finally, we covered the concrete with gravel to match the surrounding landscape.
Garden arbors and arches do not necessarily have to be set in concrete. However, this step ensures their placement in windstorms and such.
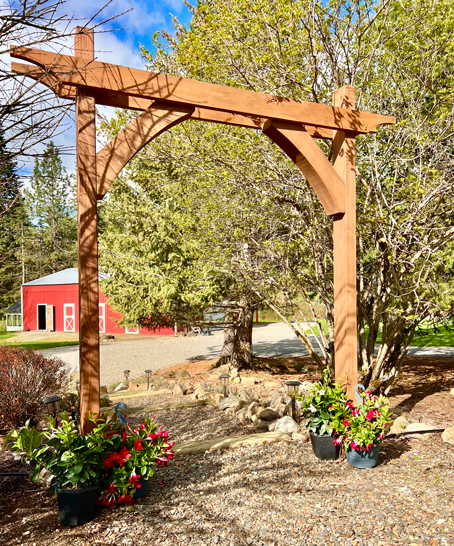
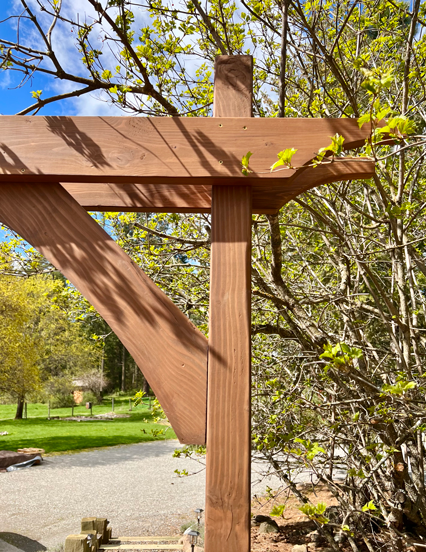
Attaching the Arbor Top
Now, let the fun and creative part begin! The next step is to attach the arbor top. Admittedly, I love to design things, so it’s no surprise we designed this arbor. On the contrary, there is an abundance of designs to copy, including this one. With the intent of using the arbor for a small condensed space, we used a simple beam and corbel design. Notably, we find it critical to consider the surrounding landscape when choosing or designing an arbor. After all, garden structures of any type should blend and befit the surroundings most naturally.
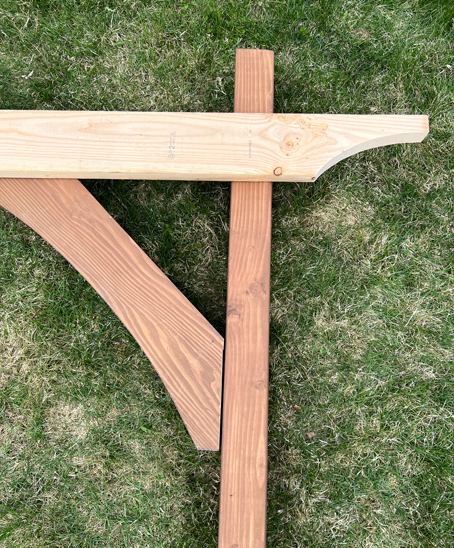
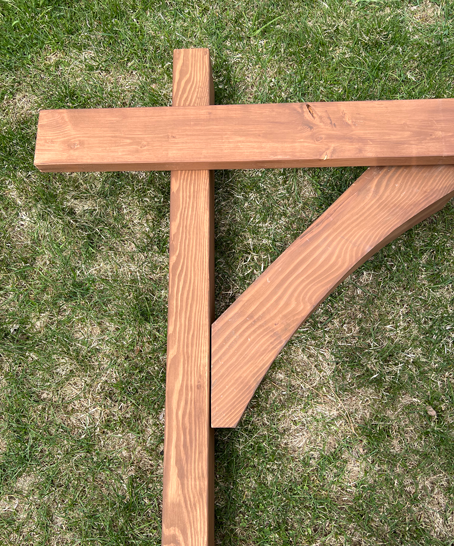
Garden Arbor Beams
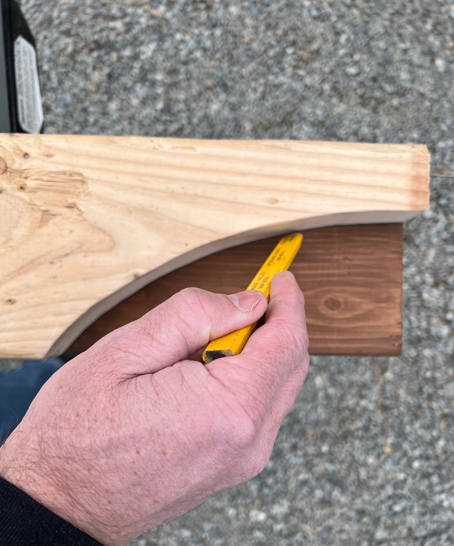
The beams are made from two 2 X 6 boards. While they can remain straight, we chose to cut a simple curve design into ours using a jigsaw. Initially, we freehand drew an elongated arch on the bottom end of a template board.
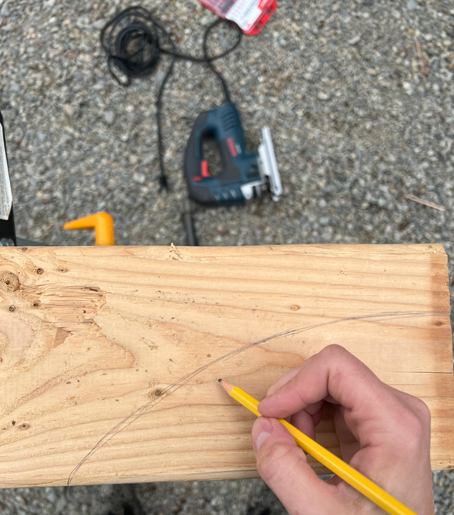
Next, we used a jigsaw to cut the board and create a template.
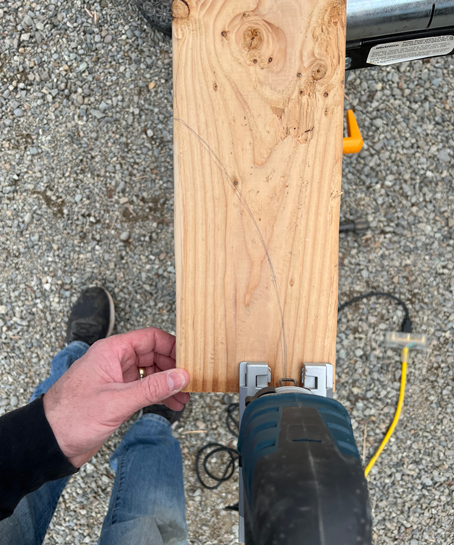
At this point, we checked to make sure the template would look good as a finished beam.
Then, we used the template to cut the pattern into the end of each 2 x 6 beam.
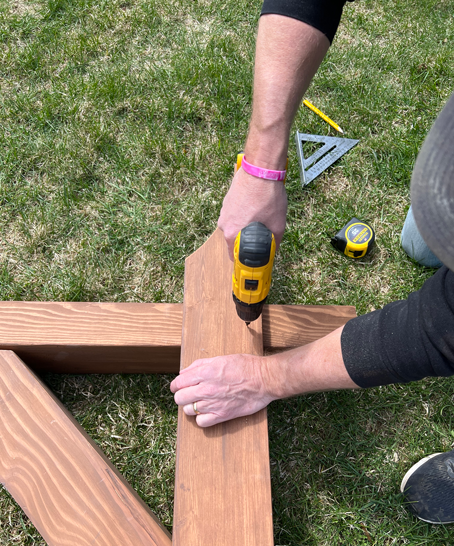
Finally, we used a square to create a straight and level line and attached the beams to the front and back sides of the posts.
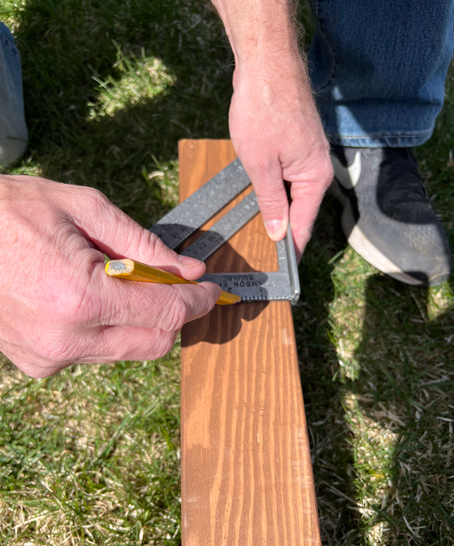
We pre-drilled holes and secured the beams with exterior screws.
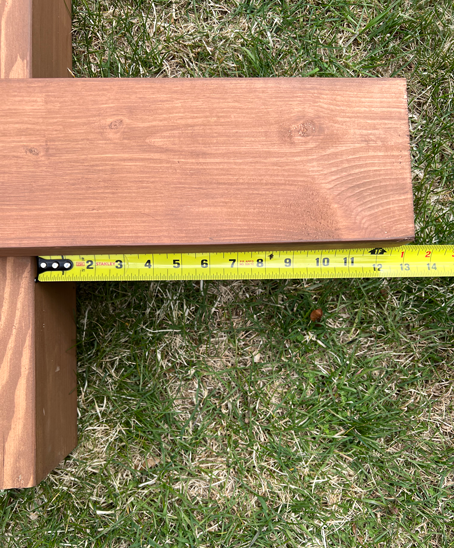
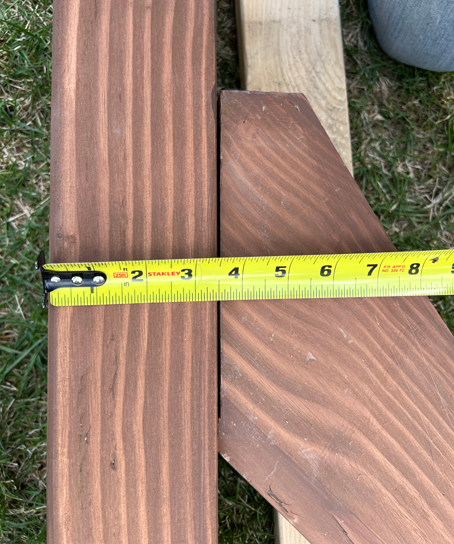
The end of each beam measured 13 inches from the post at our desired look.
Decorative Garden Arbor Corbels
For the corbels, we used the leftovers we had from building our porch. Hence our corbels were pre-cut from 6 x 6 posts using a band saw. Thus, they fit perfectly on our 6 x 6 posts. Alternatively, 2 x 6 boards make great corbels when cut using the same technique we used with the beams by drawing and cutting decorative curves. Similarly, pre-made decorative corner corbels are also great options.
Attaching Corbels
Corbels easily attach using exterior screws in many cases. Since our corbels were made from 6 X 6 posts, we measured and used 5-inch deck ledger wood screws which are similar to bolts to secure the corbels in place.
Although the package said there was no need to predrill holes for these durable screws, we did drill a few holes slightly smaller than the screws.
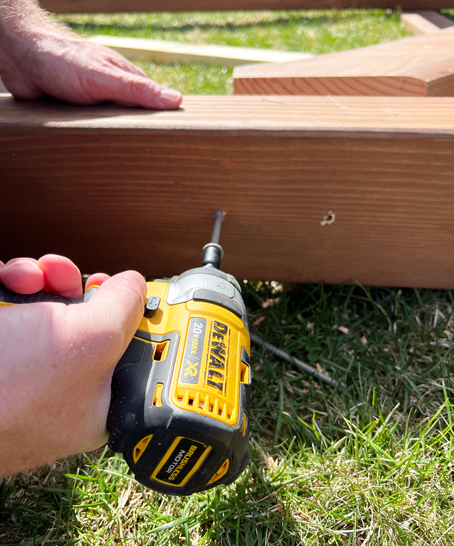
Then, we secured the corbels in place by fastening the deck ledger screws tightly.
Enjoying the Do-It-Yourself Garden Arbor
Garden structures are great ways to make gardens and outdoor spaces more enjoyable. For me, garden arbors are like doors to magical rooms. There’s a sense of wonder stepping through them to see what nature has in store on the other side. By the same token, garden arbors make the most dramatic and alluring focal points. Consequently, they are used extensively in a variety of stunning wedding backdrops. Of course, it’s no wonder why garden arbors center architectural drama in natural spaces and serve as whimsical entryways to outdoor rooms.
Easy DIY Garden Arbor
I’m smitten with our easy DIY garden arbor. It has completely transformed the pathway from our driveway to our front door. What’s more, we made the arbor in a half-day for around $100. However, that’s not even the best part! Before, the walkway was defined only by the plants that lined it. Now, our simple do-it-yourself arbor defines the space with architecture and charm. Not only does it make the best focal point, but it also feels like the prettiest magical door from the front yard to the back.
Hopefully, you can use this DIY arbor tutorial to build your treasured version of it. As always, thank you so much for joining us here in sharing ideas and inspiring some home love. Feel free to leave comments or ask questions below. For more DIY outdoor builds, check out my blog post on How to Build a Farmhouse Table or the one about How to Build a Porch Swing.
~Get behind the scenes of the blog by joining me on Pinterest and Instagram.~
*This post contains some affiliate links for your convenience. I make a tiny portion of the sale with no additional cost to you whatsoever. Click here to read my full disclosure policy. Thank you for supporting this blog.*

0 Comments