

Easy DIY Farmhouse-Style Porch Swing
I don’t know about you, but to me, there is truly no better place than a cozy summer porch swing. Living in a wintery region makes the warm weather so appreciated. We use each beautiful day with intention and gratitude. It’s why our outdoor spaces become living spaces throughout the summer.
I’d always dreamed of spending summer days on a porch swing, but not just any version. This swing needed to have character and charm, so I created the vision and asked for it for Mother’s Day. My husband and sons quickly went to work and finished this beauty for me in one afternoon.
Knowing we accomplished building and hanging that swing from scratch in one frugal afternoon, makes our perfect porch moments so much sweeter.
Materials
Let me show you how we built a small and dreamy bed rope swing with under $300 and just a few tools.
What you need:
8- 2X4 8 ft pine studs
*These can be cut with a chop saw or Home Depot can pre-cut these for you to these lengths:
- 2 at 55 inches (base frame)
- 2 at 52 inches (back support)
- 2 at 24 inches (side armrests)
- 8 at 28 inches (base frame and slats)
- 2 at 28 1/2 inches (armrests)
2- 4X4 8 ft untreated pine posts
- 2 at 64 inches (base beams)
- 2 at 16 inches (armrest posts)
- 2 at 22 inches (backrest posts)
- screws 1 5/8″
- thick rope (3/4 inch to 1 inch thick)
- heavy duty hooks for hanging
- crib mattress
- 1-inch spade drill bit
- drill
- square
- measuring tape
Optional:
- Kreg jig and Kreg screws
- chisel
- chop saw
- circular saw
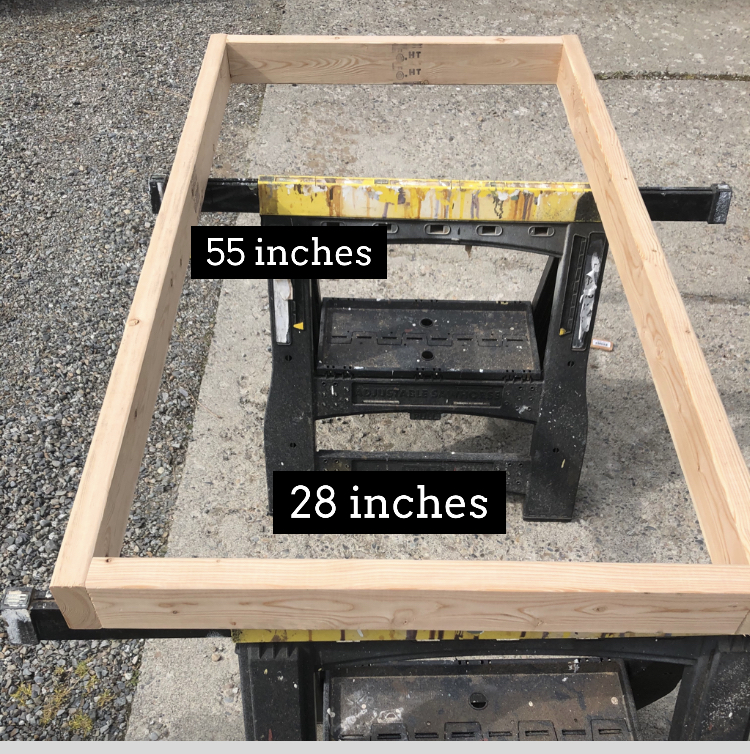
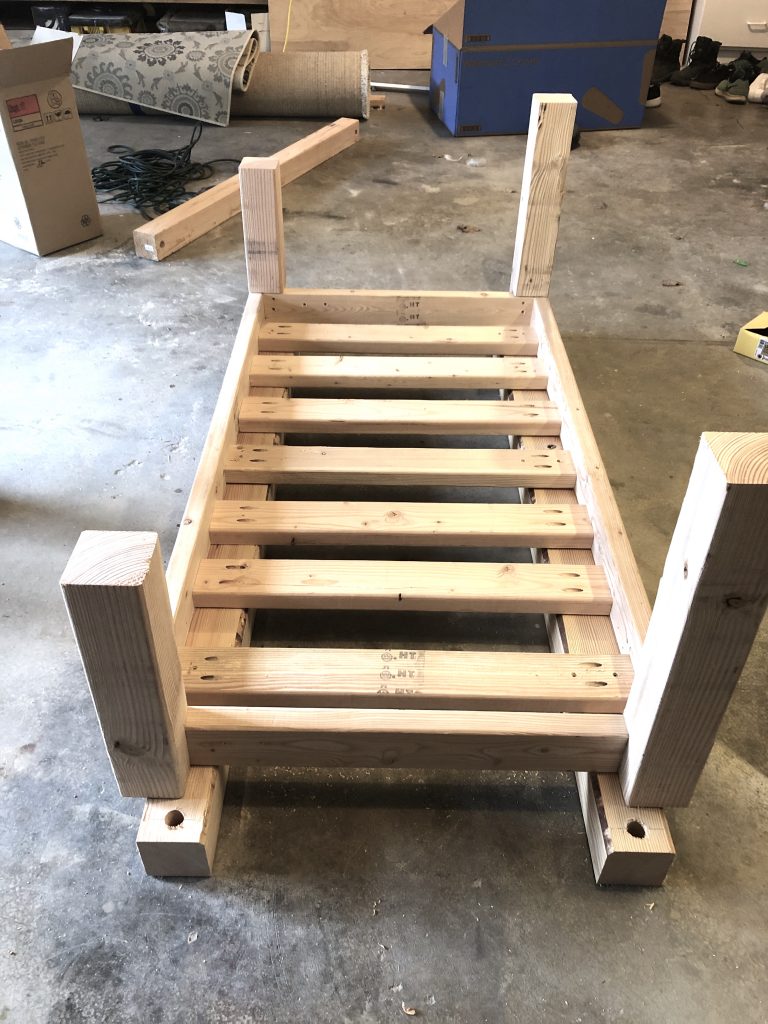
The first step was to create a box just big enough to frame a standard-size crib mattress perfectly. I chose a crib mattress because it was small enough for the space I needed the swing to fit in, and it has a protective moisture barrier making it great for a front porch. To fit a standard size crib mattress, we made the long sides of this box measure 55 inches, and the short sides measure 28 inches.
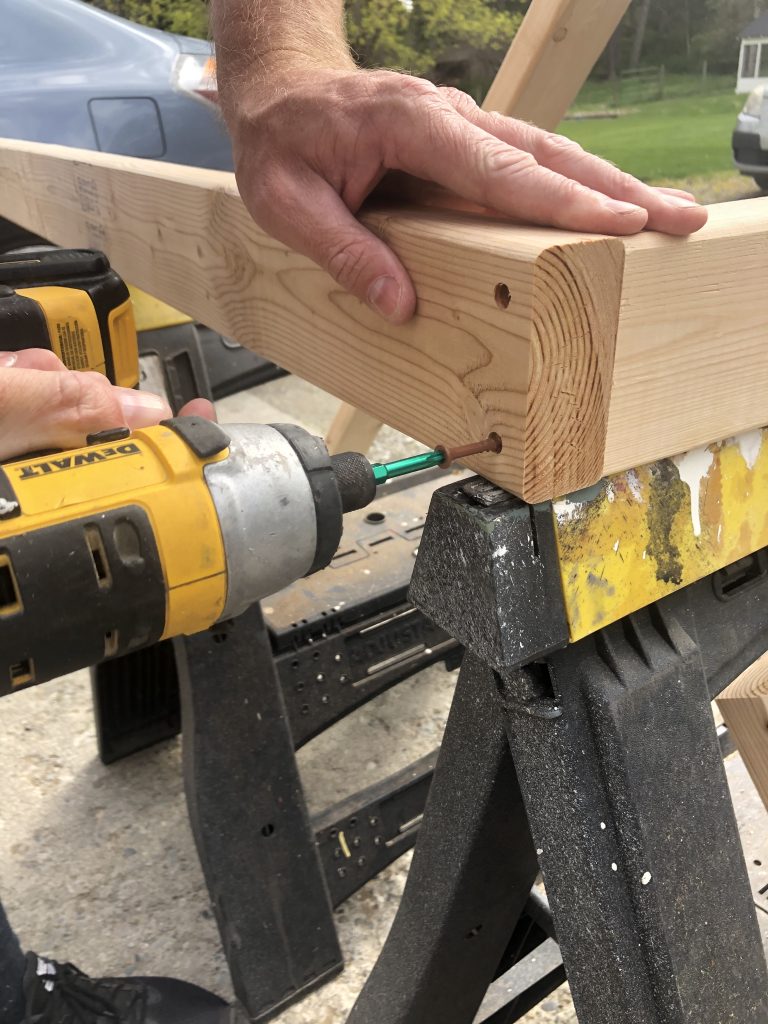
Putting the frame together was as easy as pre-drilling pilot holes and adding two screws to each corner. We used a square tool to ensure a square angle at the corners.
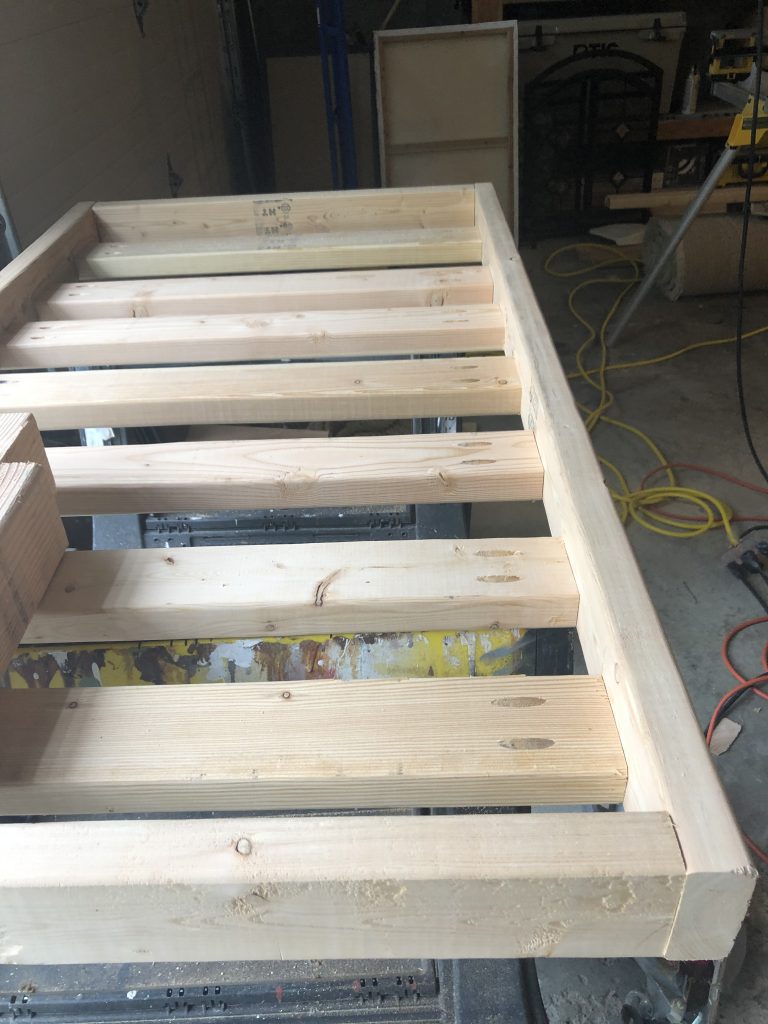
Next, we added slats in the base of the frame to help support the crib mattress and make the seat well supported. We used 6 – 2 x 4-inch pine boards cut at 28 inches each.
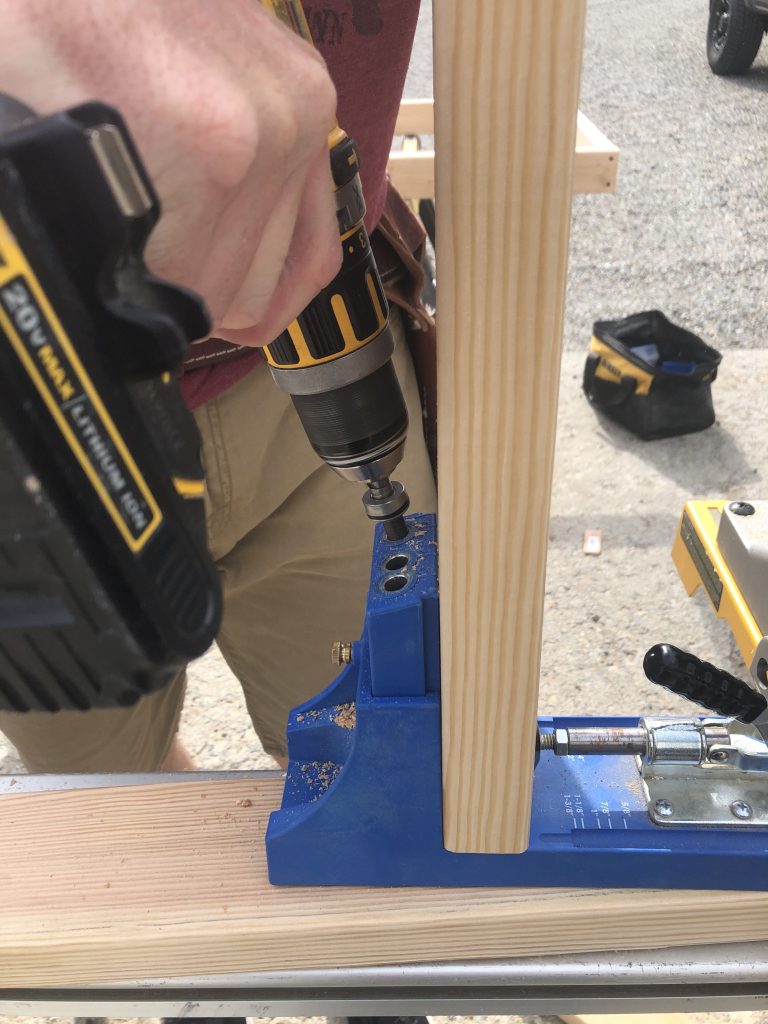
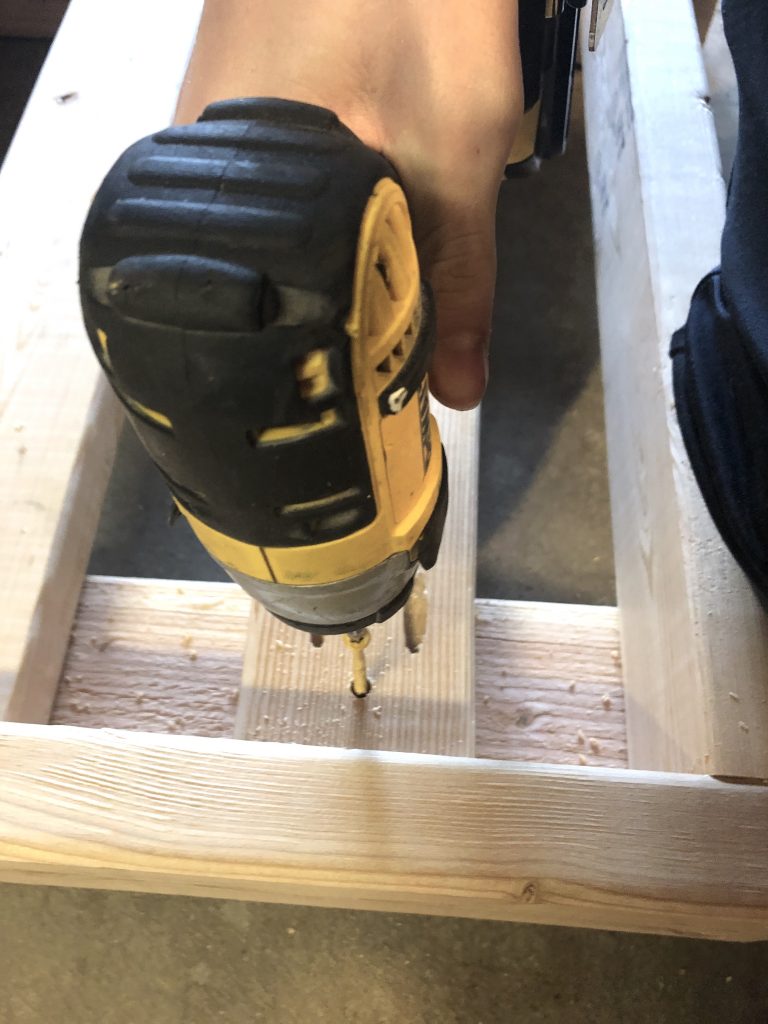
Pocket holes are a great way to create sturdy support. This Kreg Jig tool holds the board in place and aligns drilling for perfect pocket holes. In this case, screws then go through the pocket holes and into the perpendicular boards of the frame.
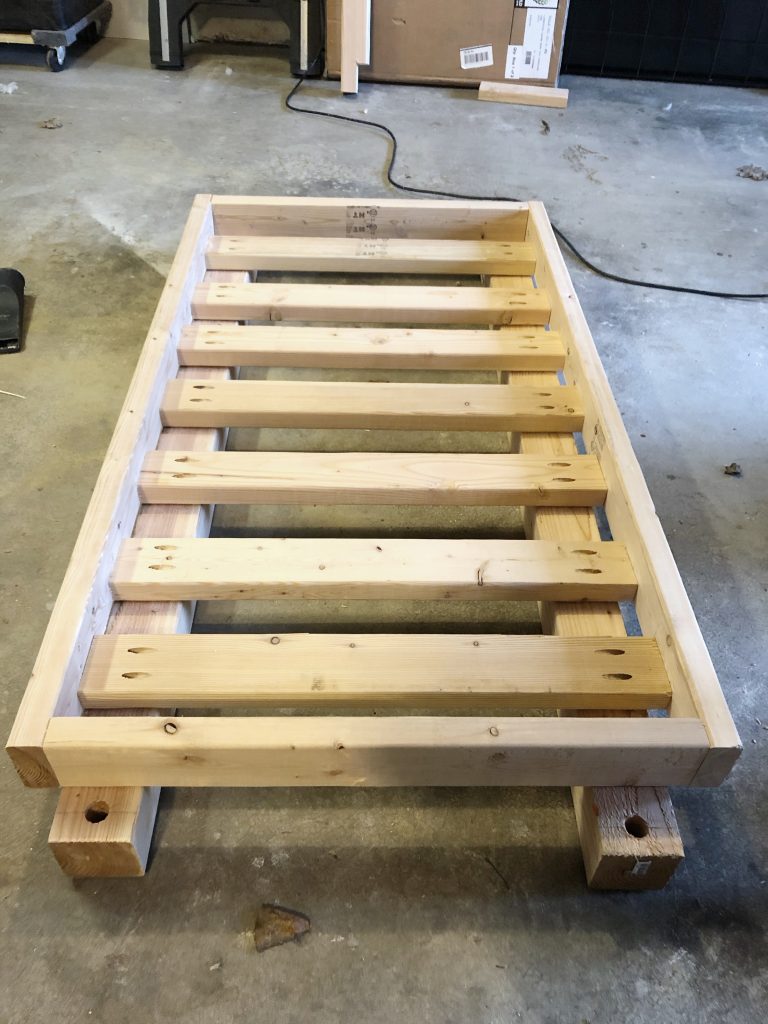
The mattress frame rests on two 64 inch beams cut from the 4X4 inch pine post. We used a chop saw, but Home Depot will pre-cut posts like these if they have the correct measurements.
We pre-cut the rope holes as shown in the next step and aligned the mattress frame on the beams.
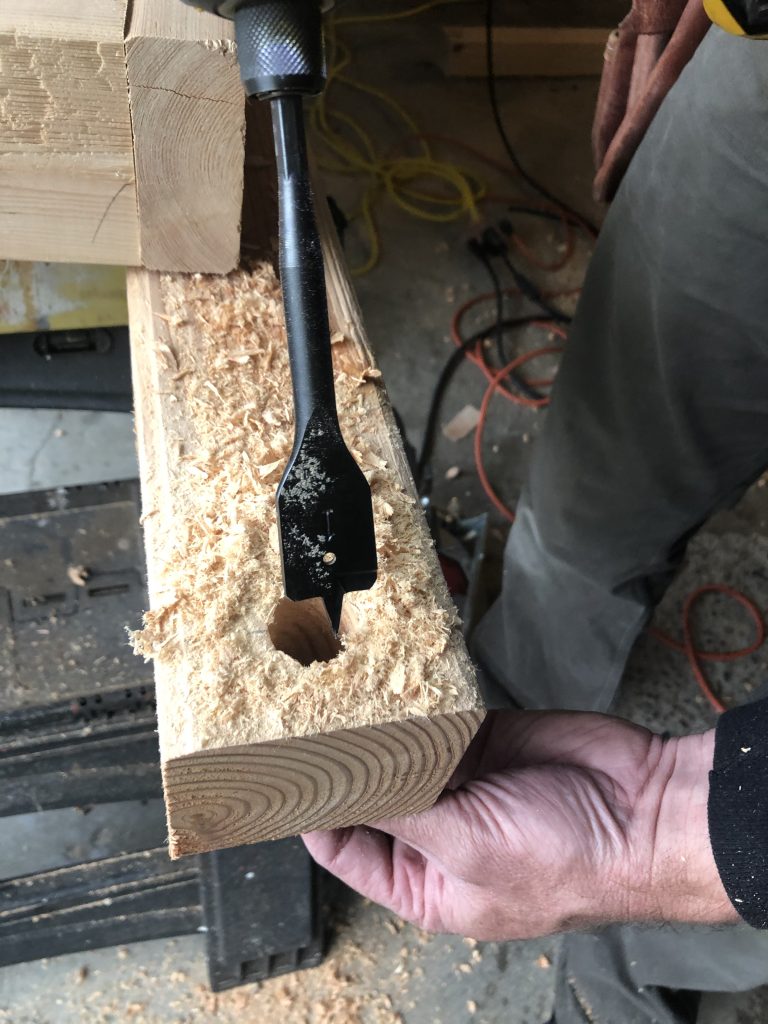
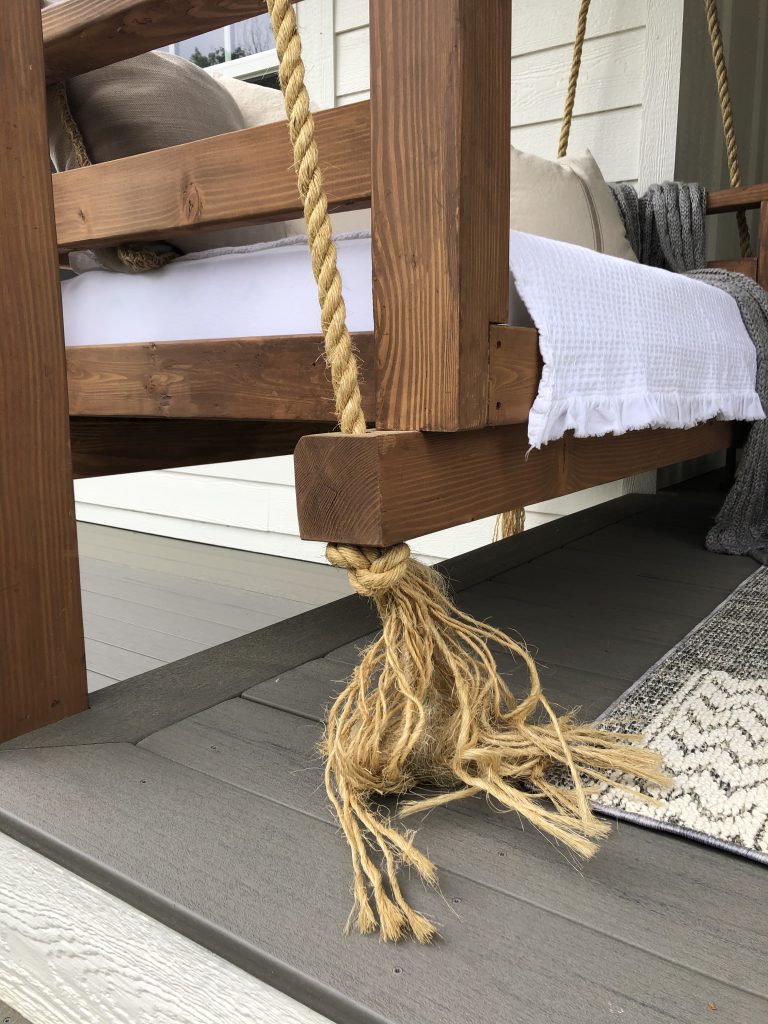
I wanted each beam to have a nice-sized hole on each end to thread some pretty chunky rope through. I could have used hooks, but I liked the way the rope going right through the wood gave the right charm and character I was looking for.
The drill bit we used is called a spade bit and is used for drilling holes through wood. In this case, we used a one inch bit leaving us enough room to thread a 3/4 inch thick rope through it.
Once we had pre-drilled rope holes, we centered the mattress frame on the beams with 4 1/2 inches of beam extending out on both sides. Then we were able to secure the frame to the beams by screwing the slats into the beams.
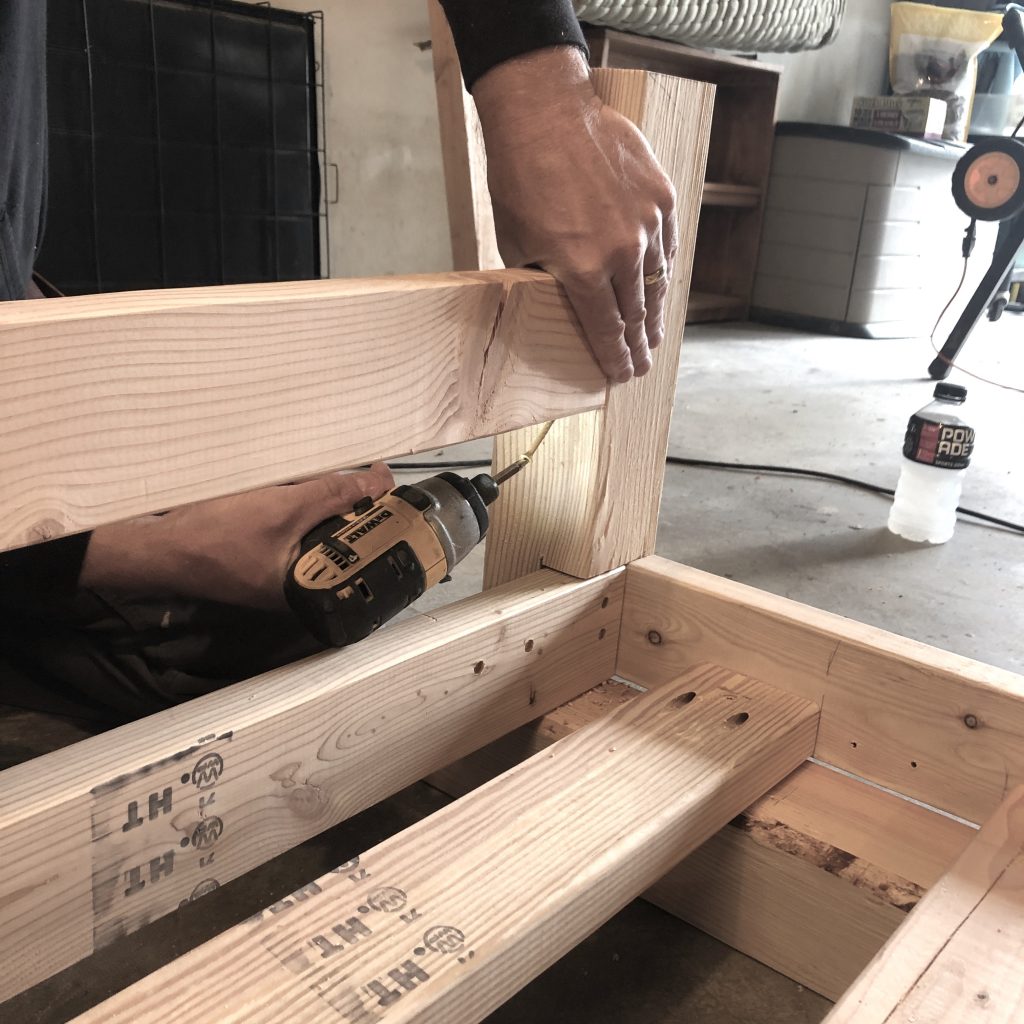
The armrest posts we cut at 16 inches long for the front and 22 inches long for the back.
We wanted the front armrest and backrest posts to notch into the mattress frame. This gave the swing a sleeker look. We knew the notches would need to measure at 4 inches to fit over the 2 X 4 board.
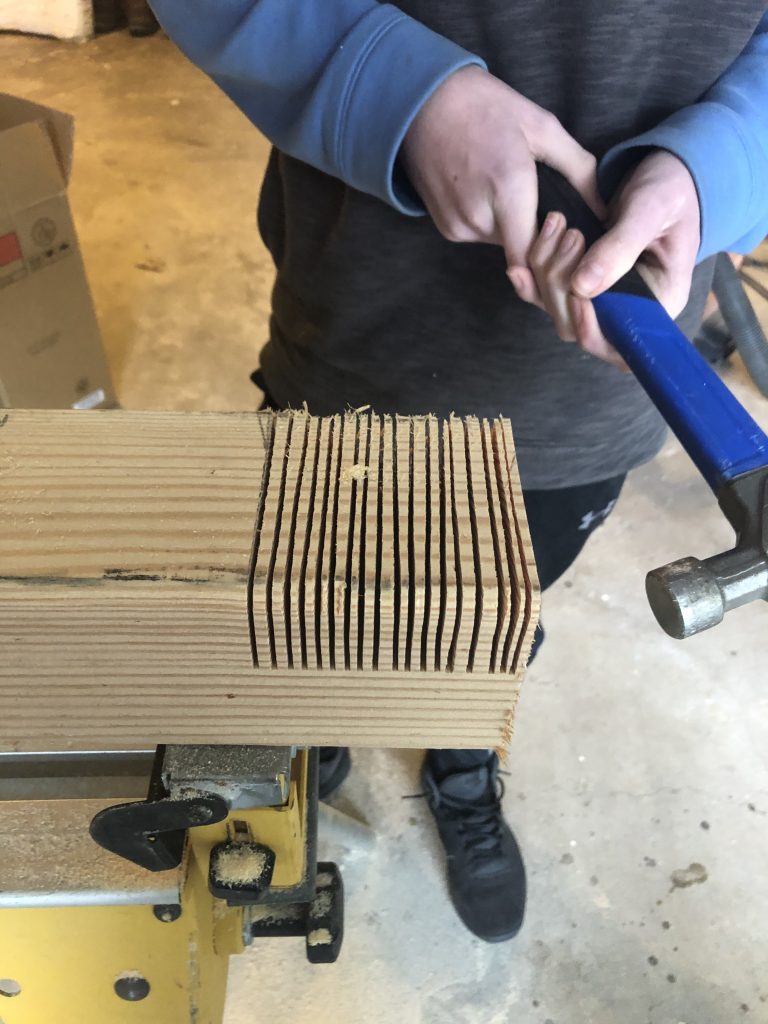
This step was optional but easy enough for my 13-year-old son to spend some teen energy. To accomplish this, we used a circular saw to cut halfway into the posts (about 1 1/2 inches x 4 inches). A hammer easily knocked out the small cuts of wood. We followed up with a chisel to make a semi-smooth surface in the notch.
We had to play with the positioning on the notched posts while trying to decide where they would look the best. In the end, we decided to line them flush with the front and back edges of the frame.

My husband likes to keep his screws hidden for a cleaner look, so he finds ways to attach screws wherever he can hide them. We attached these posts by screwing them in from the inside and into the notch. We know this will not be enough support, but the coming cross boards will be the added support we’re looking for.
Moving to the armrests and backrest, we centered a 24-inch 2×4 board on each side and topped off each armrest with a 28 1/2 inch board that overlapped the front post.
Again, we attached and hid screws wherever possible.
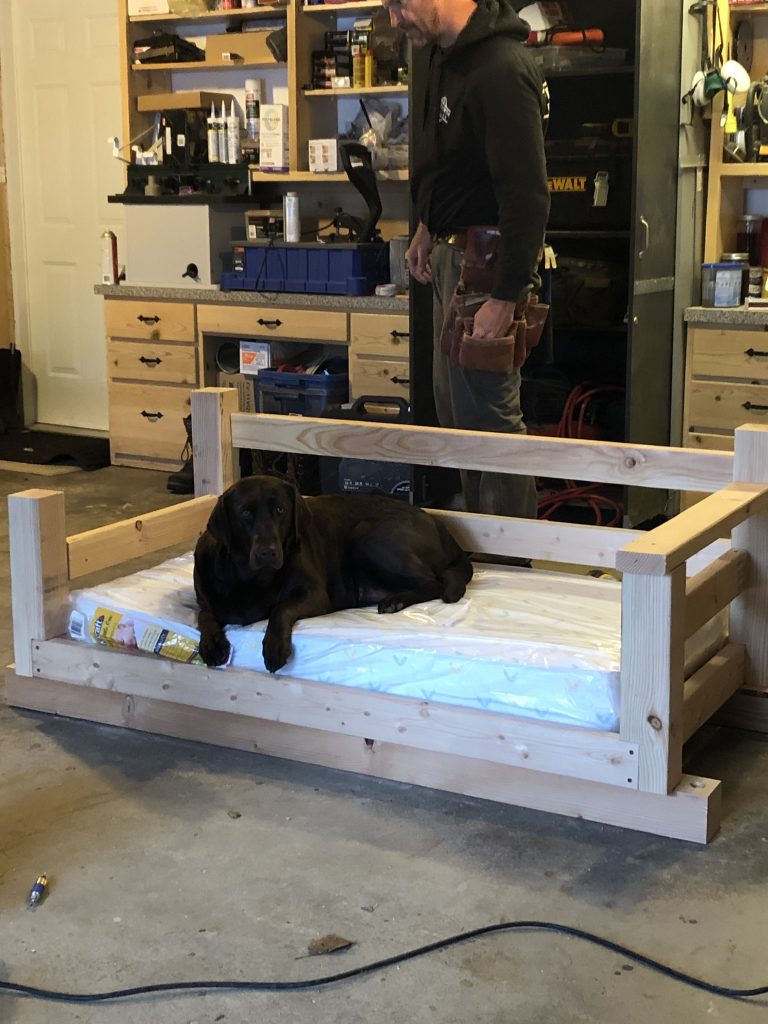
This part got so exciting. We were so close to being done. Sophie was pretty sure we had just built her an epic dog bed.
To secure a comfy backrest, we added two 52 inch backrest boards. We placed the top board 2 1/2 inches from the top of the post and took the bottom board another 4 1/2 inches down from that.
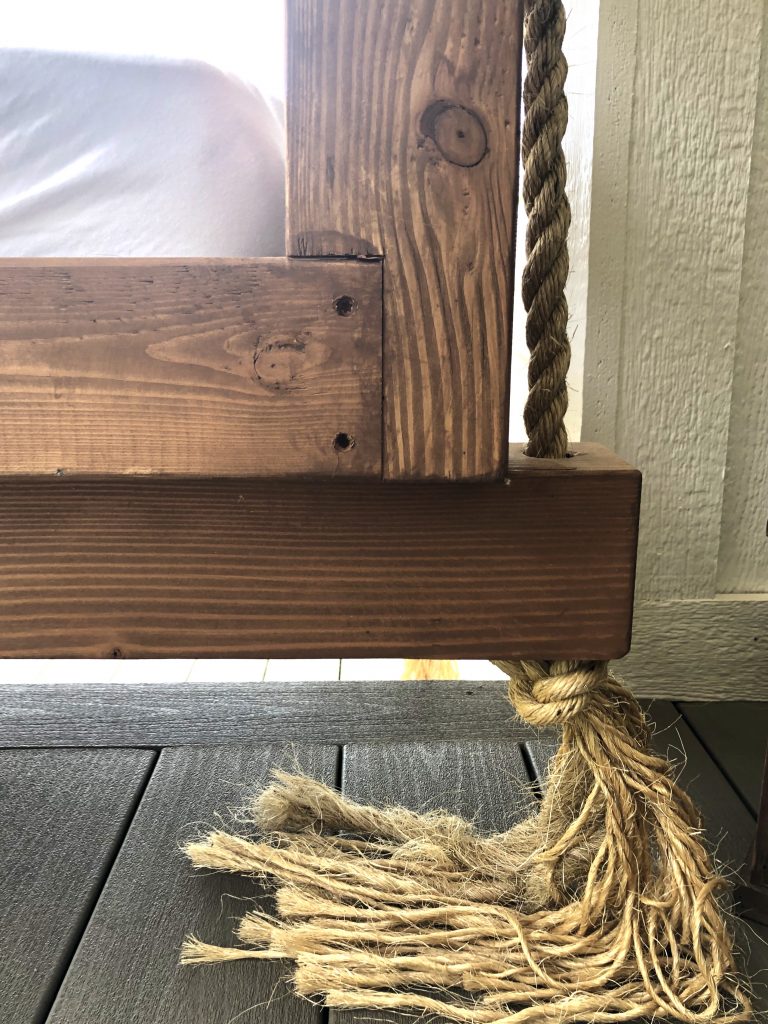
Finally, it was time to stain and hang the beautiful thing. We picked a stain that matched our porch beams.
Hanging the swing took some thought. We only had one beam to hang it from, so we had to cut the rope the exact size for an accurate sitting height. I also wanted the rope to hang just right since it was part of the overall design cuteness.
We placed the swing on buckets to measure and adjust the rope until we came to our desired look. I love the look of the frayed rope ends cascading onto the porch floor, so we left plenty of extra rope ends.
While the swing was propped up on buckets, we threaded the rope through the holes and tied knots on the ends. It’s helpful to tape the ends of the rope to make it easier to thread through the holes.
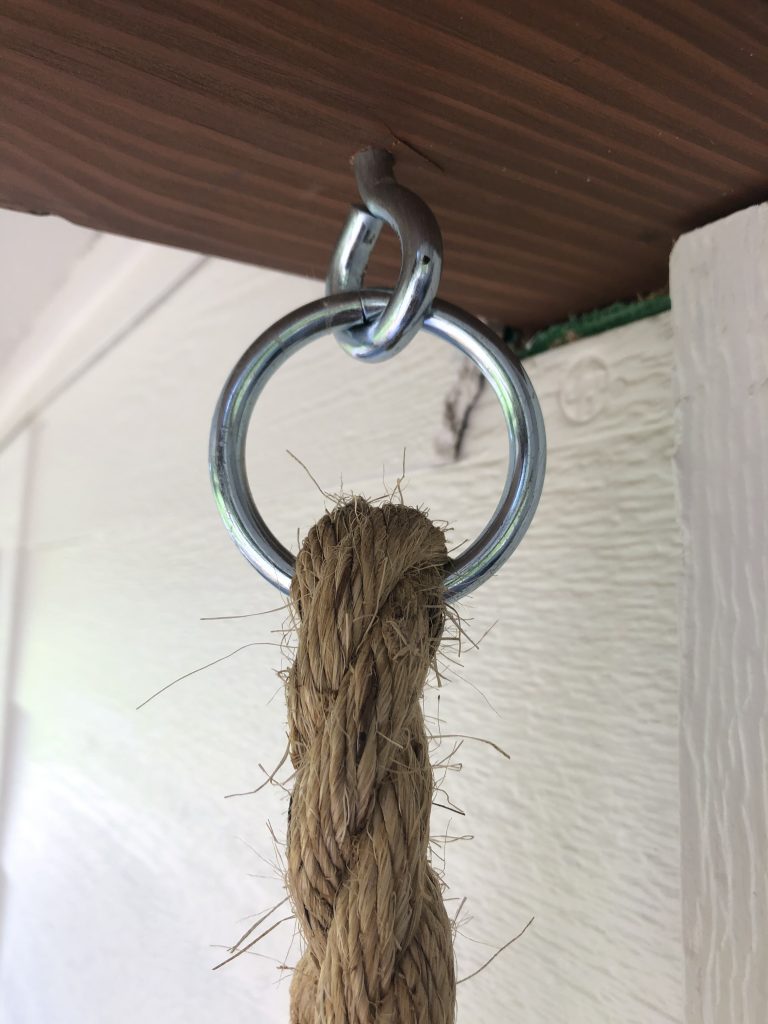
We used a heavy-duty hook and loop system to attach to the beams. It only took two, since we only had one beam to attach into. I would have gone with four separate ropes and four hooks if we would’ve had a level and sturdy ceiling surface to lag into.
I could not be more excited with how it turned out! To cozy it up, I ordered cotton crib mattress sheets. They are easy to put on and easy to take off and wash. I also bought some outdoor pillow inserts and removable/washable pillow covers for extra coziness.
When I want a refresh, I’ll drape a blanket or a drop cloth over the mattress and change out the pillow covers to give it a whole new look.
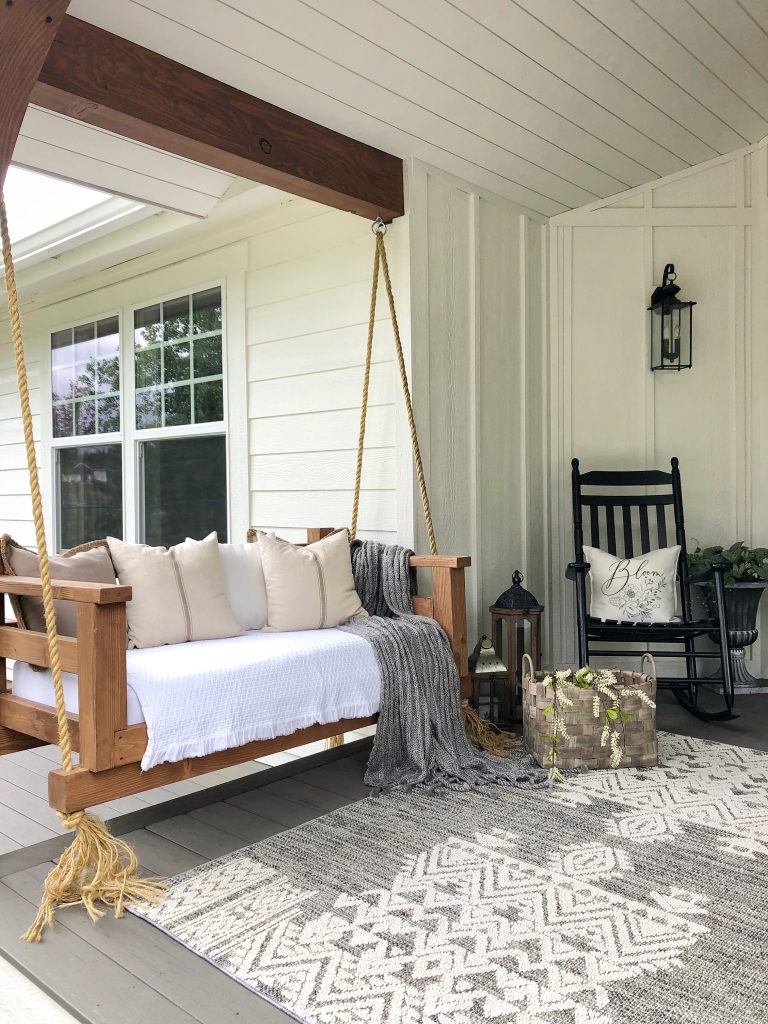
I couldn’t be more proud of how this turned out. My guys worked so hard to make this feel special for me. They took the design in my head and recreated it to exceed my expectations. Not only will this porch swing hold memories just from the way it was created and built, but we have a lifetime of memories left to make on it.
This porch swing is easily one of our favorite spots to spend time. We hope sharing it with you can help you find the same or similar experiences with your own do-it-yourself fancy porch swing.


0 Comments