

This tutorial will show how to build a farmhouse-style table in 6 easy steps. Get a real wood table with an authentic farmhouse style for a fraction of the cost when you build it yourself. This do-it-yourself tutorial makes it easy.
How to Build A Farmhouse-Style Table in 6 Easy Steps
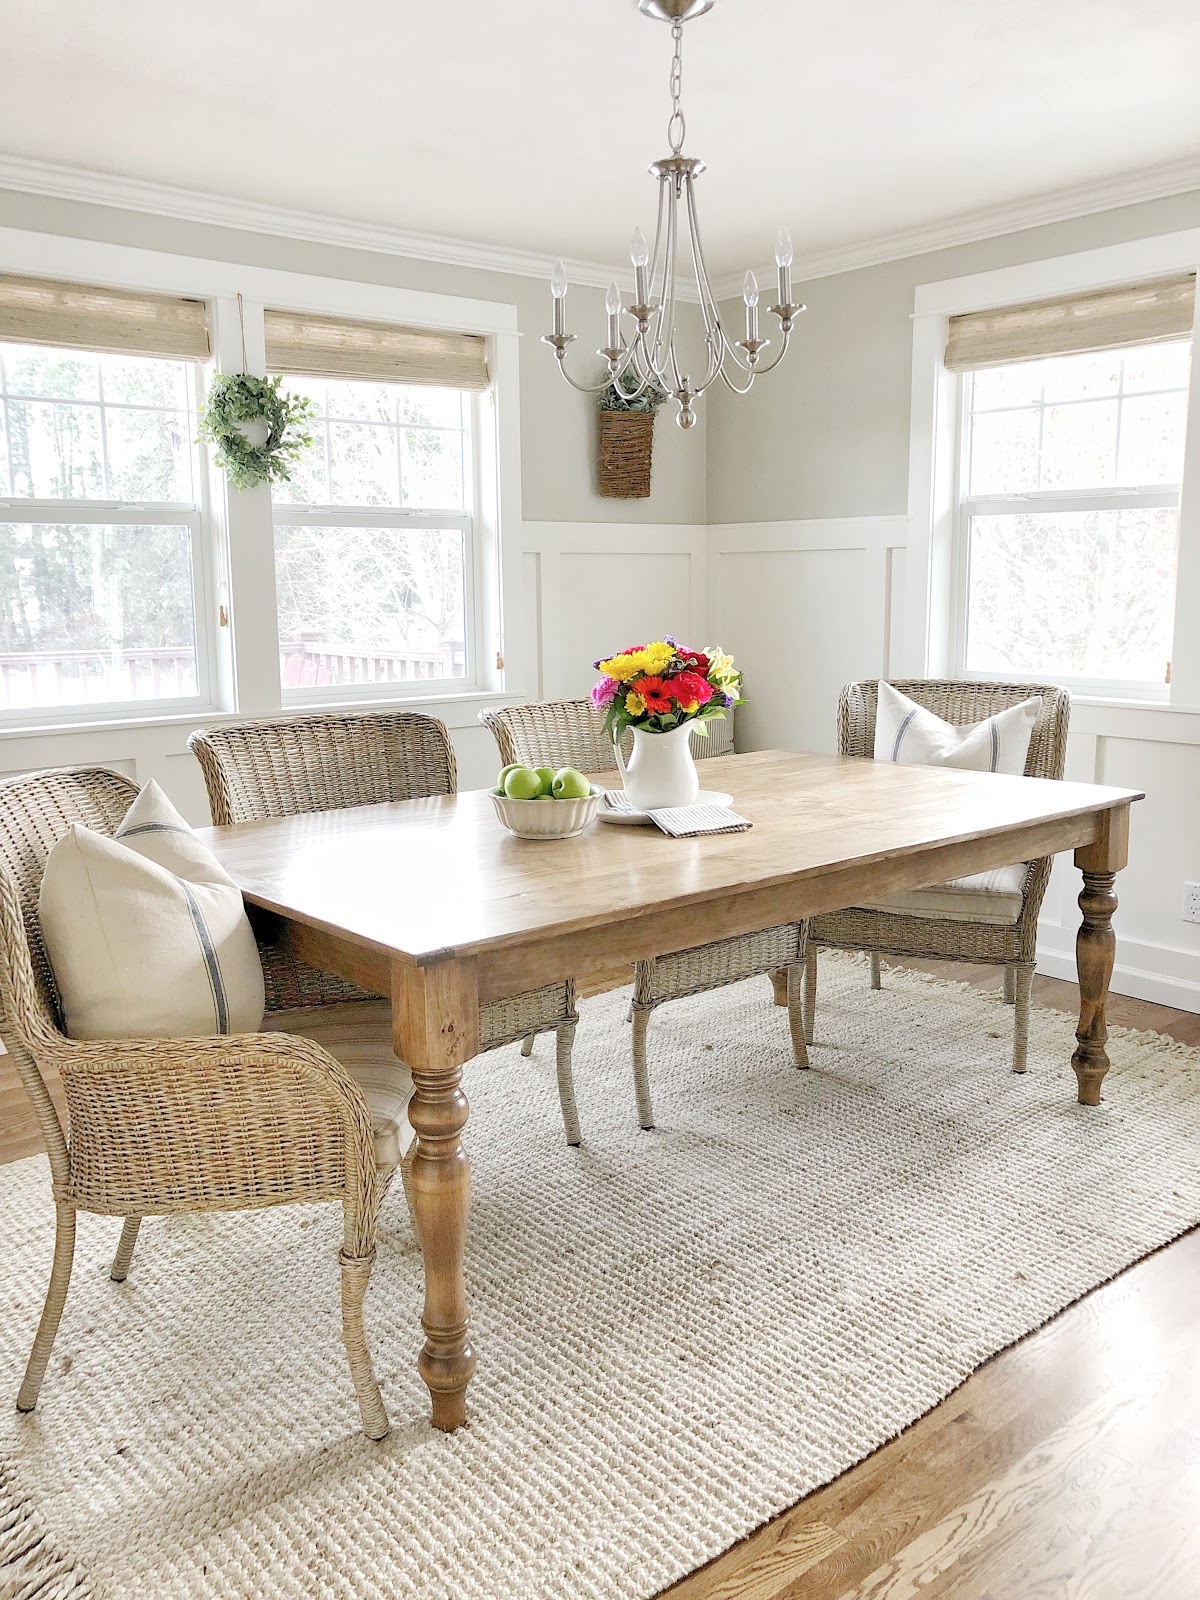
The memories made around a dining room table are priceless. There is something incredibly fulfilling about gathering together with our beloved family or close friends to eat and form forever bonds around a comfortable table. Finding the right dining table was as serious a job as purchasing the right car. With this in mind, our family set out to find the perfect farmhouse table for our farmhouse. What we found instead was a good variety of fabricated wood. When we did find authentic wood, the price was a real problem for our budget. You will not believe what we discovered.
If there’s one thing I’ve learned from four years living in a fixer-upper home, it’s that just about any do-it-yourself project can be tackled with some ingenuity and a whole lot of faith. This frugal heart doesn’t live cheap, and you don’t have to either. After doing a little research, we found that making this table was easier than we had imagined. Insert the Lavender Brook Home DIY Farmhouse Table Project.
Getting Started on the Farmhouse-Style Table
Before we start, let’s expose a few disclaimers. Keeping do-it-yourself projects easy and doable is the name of our shameless game. We know our limits and hire out the experts when we hit them. In this case, we’re talking table legs. We do not own or possess the knowledge to run a lathe, so we found a lovely Etsy maker to order our turned table legs, and had them shipped.
We used pine boards to hold true to an authentic farmhouse table, but any wood of your choice would substitute for pine.
Materials:
6- 1 x 8 pine choice lumber boards (Look carefully down the length of the boards when selecting to select the straightest possible options.)
2- 1 X 3 pine choice lumber boards
4- 1 x4 pine choice lumber boards
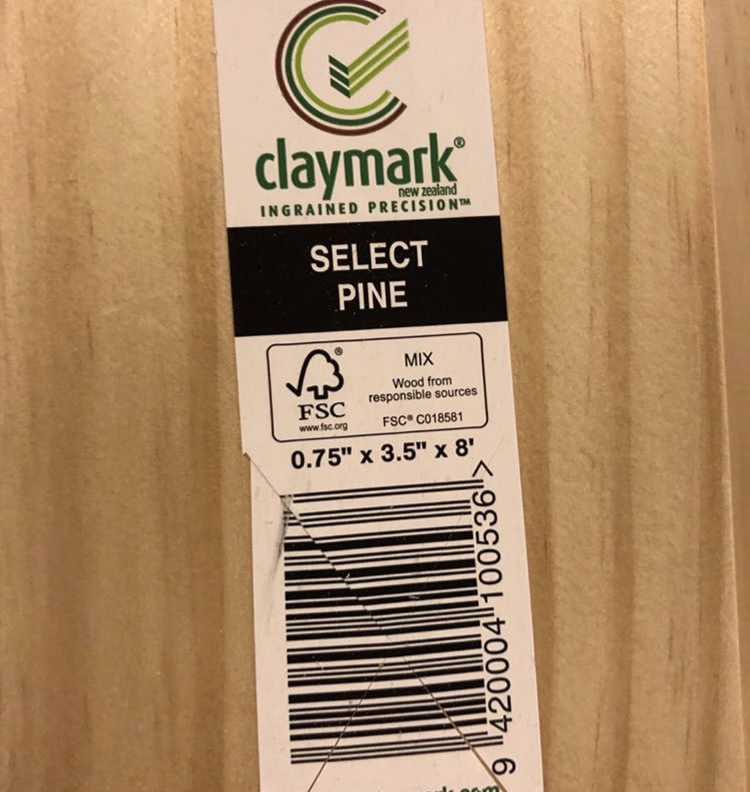
4- 3 ½ in square base x 29 inch long turned table legs
*We ordered our turned legs from a talented maker on Etsy. Lowe’s sells pre-turned legs as well. The legs for this table measure 3 1/2 inches at the square base. They are 29 inches in length.
Wood glue

Tools:
-clamps (bar clamps and quick release clamps)
-circular saw
-80 tooth circular saw blade
-aluminum guide rails as a
-straight edge cutting tool
-Kreg Jig
-Kreg Jig screws 1 1/2 in
-drill
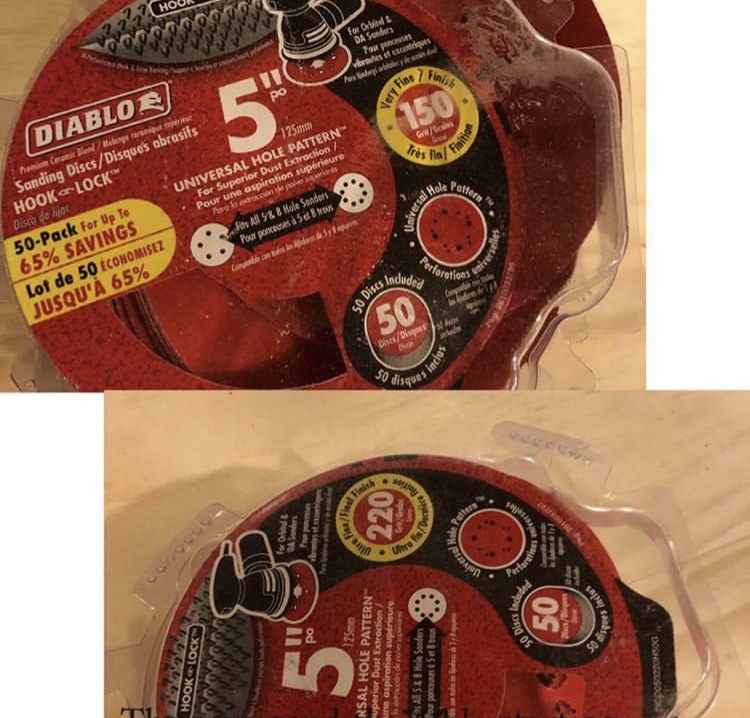
-orbital sander
-50 and 150 grit sandpaper
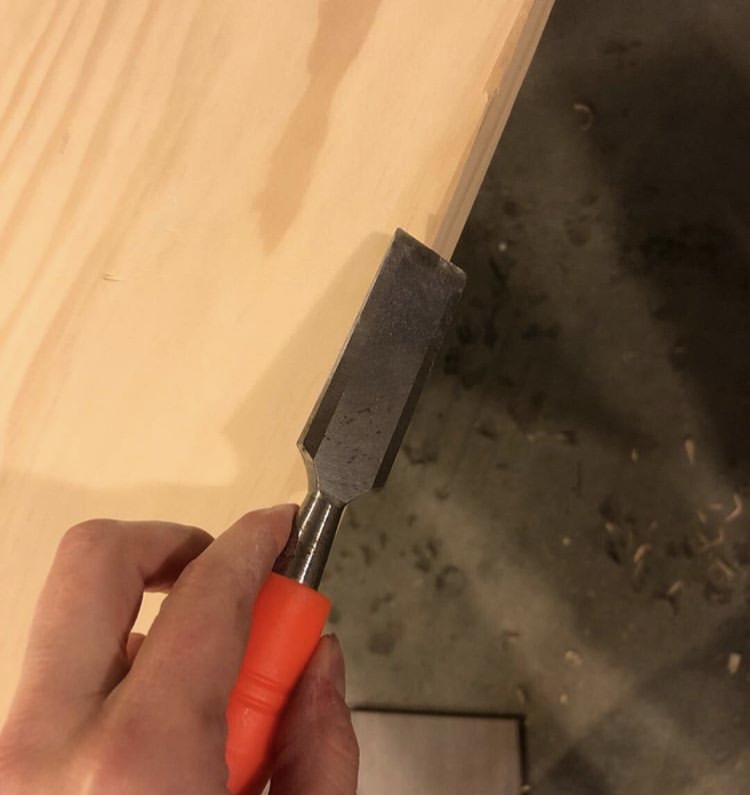
-chisels, hammers, and other distressing tools
Finish materials:
-a stain of your choice
-staining pad sponge
-oil based wipe on poly
-cotton rag
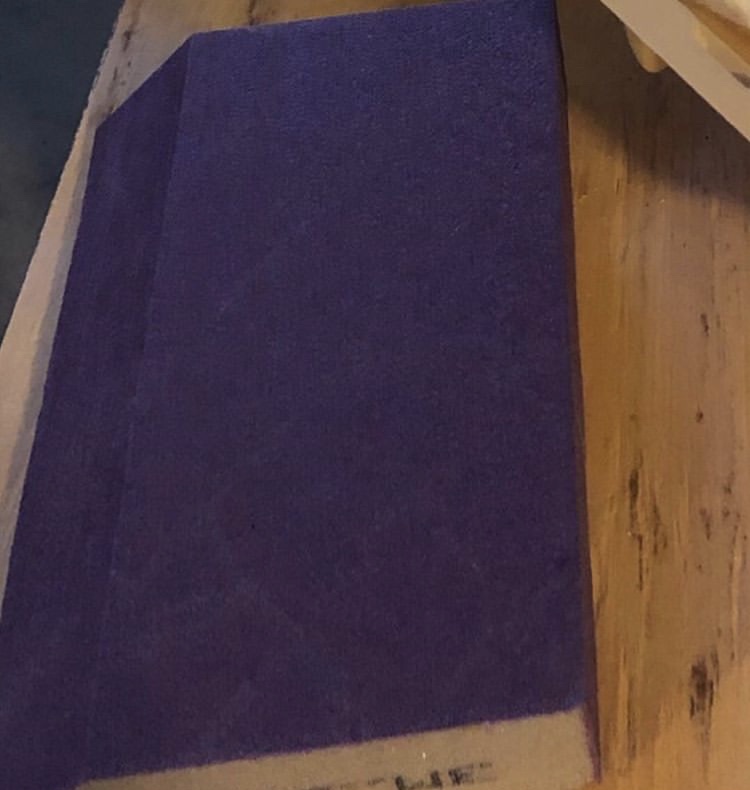
-tack paper
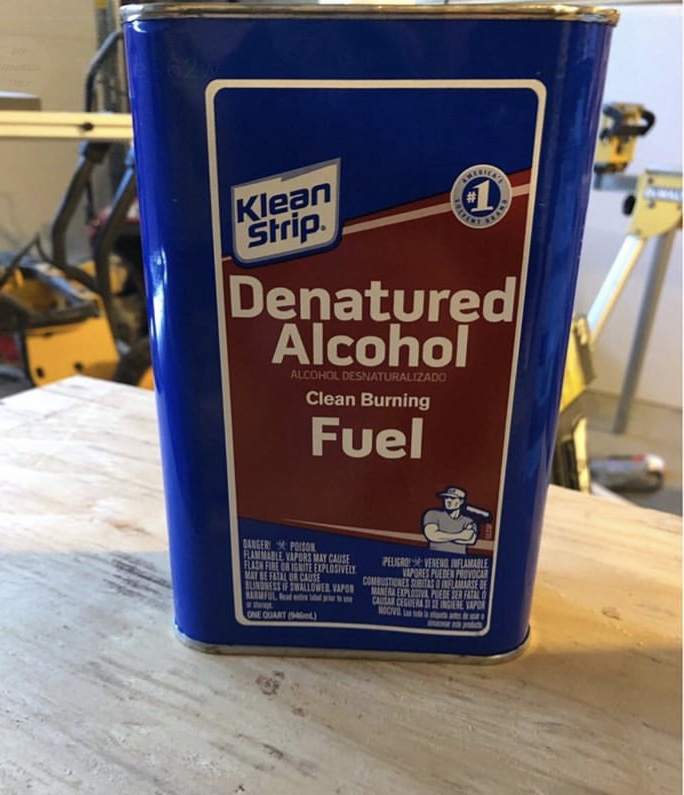
-denatured alcohol
Building the Farmhouse Tabletop
Step 1: The Table Top
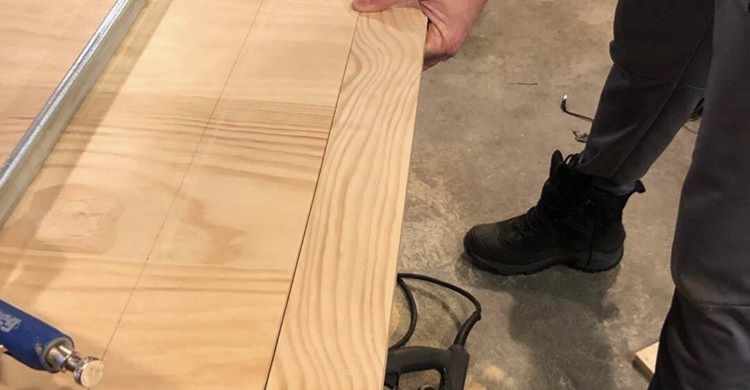
The first step is to get started by gluing 6 – 1 X 8 pine choice lumber boards together using a bar clamp to secure the boards while the glue dries and sets. If you look carefully down the length of the boards, you’ll see a slight curvature proving this board was part of a round tree. Alternate the curvature so that the rounded part rounds upward on one board and dips on the next. Continue alternating boards. Doing this prevents the hill and valley effect. Then, be sure to wipe off any seeping glue thoroughly while it is still wet. Consequently, any stain added later will not saturate through leftover glue.
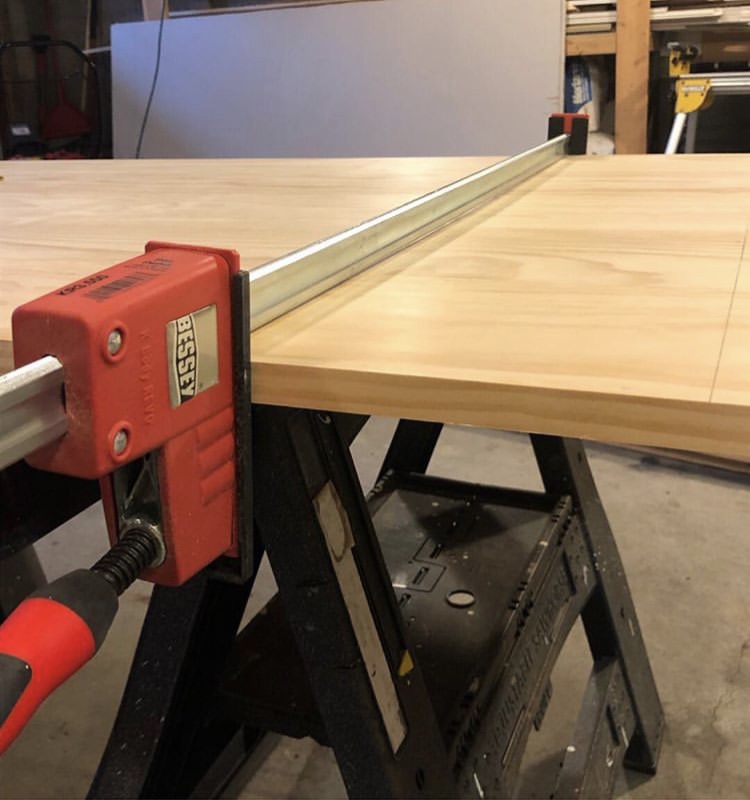
When the glue is dried and cured completely, you should have a nice solid table top with uneven ends. Any straight edge available to create a nice straight cut line at each end will work. Ultimately, specially designed aluminum guide rails were an effective straight edge. In essence, they made a great cutting tool especially helpful in guiding the circular saw towards the perfect straight cut. Cut the uneven ends off with the circular saw and an 80 tooth blade. Your overall tabletop should measure 43 1/2 x 77 inches, but you can cut the ends to whatever length fits your space.

Strengthening the Hold
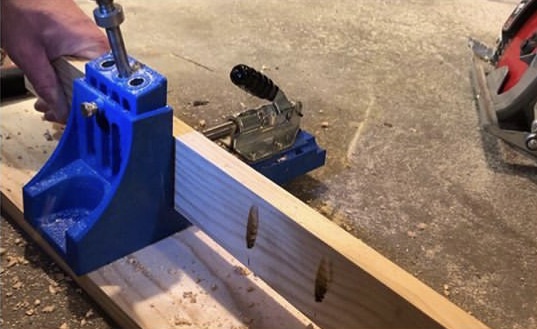
Let’s make one more quick addition to strengthen those ends! First, add a 1 X 3 board, cut to the width of your table, to each end. Next, we’ll secure these boards using pocket holes. If you’ve never used a Kreg Jig to pre-drill pocket holes, you’ll find the tool to be well worth your investment. Specifically, this little jig will guide your drill to make the perfect pocket holes underneath the table. Use the Kreg Jig to pre-drill pocket screw holes. Clamp and glue the ends in place. Finally, screw into the pocket holes to secure the board in place from the underside of the table. The jig screws make a super sturdy hold, hide the screws, and add the perfect finishing touch to the tabletop.
How awesome is that? You have your very own wooden tabletop. I can almost hear you thinking of a hundred other things you’d like to glue and clamp. Keep reading. Let’s unveil how to complete this project.
Building the Table Base
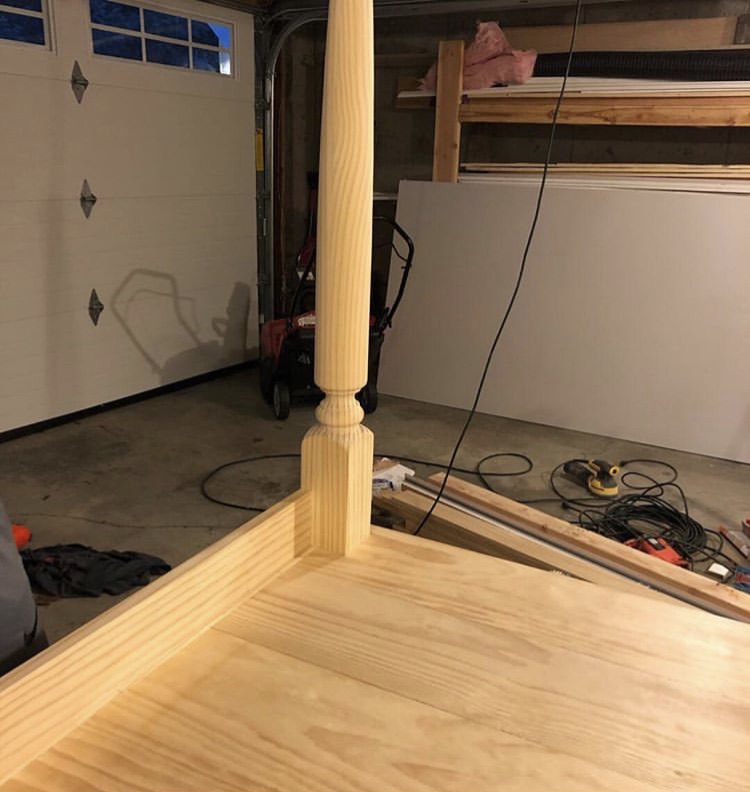
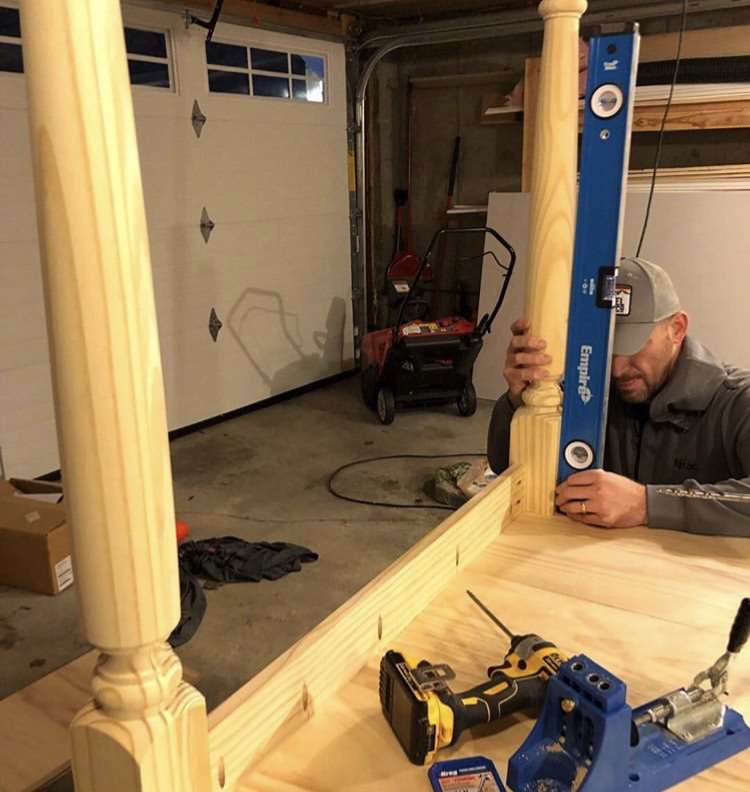
Step 2: Table Skirting and Legs
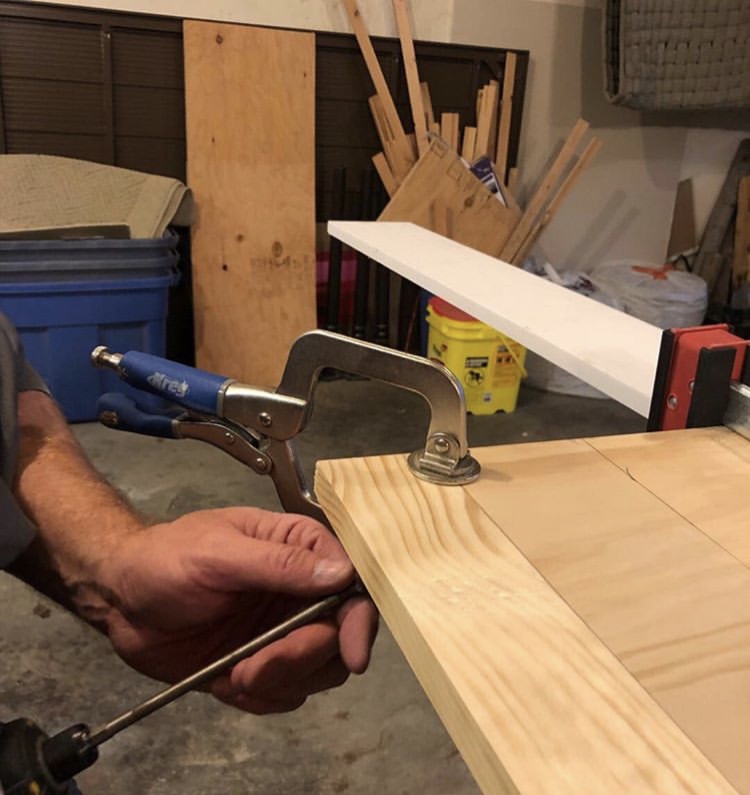
Now that the top is complete and curing, it’s time to add a skirt and those sexy pre-made legs! To begin with, we’ll measure and set the placement of table legs to build the skirting around it. First, lay the tabletop topside down on something that will not damage the surface. In this case, we used a nice set of sawhorses. Then, set the square base of the table leg on the corner, measure one inch in from both edges and draw pencil lines to mark the spot. Do this for all four legs.
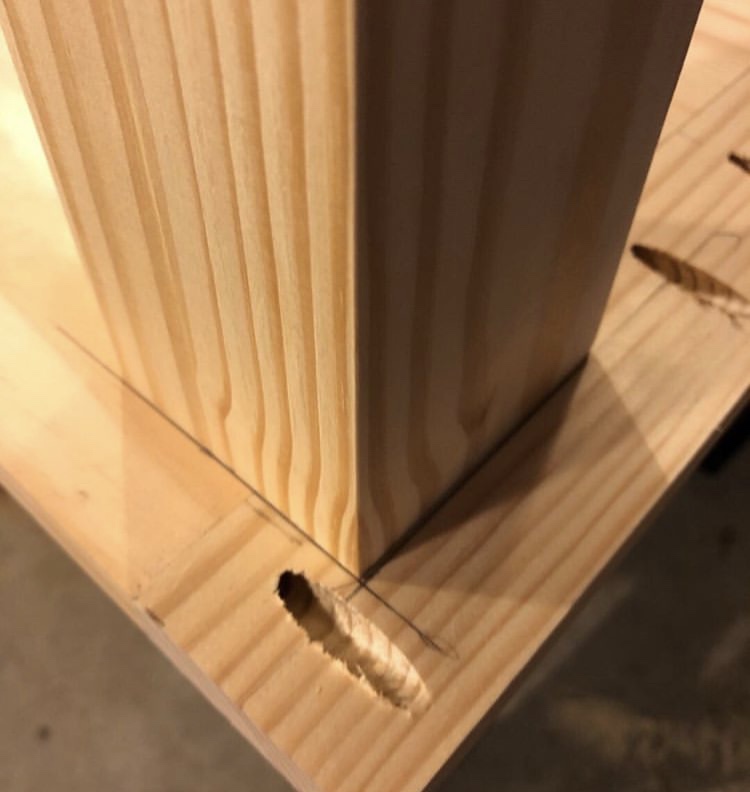
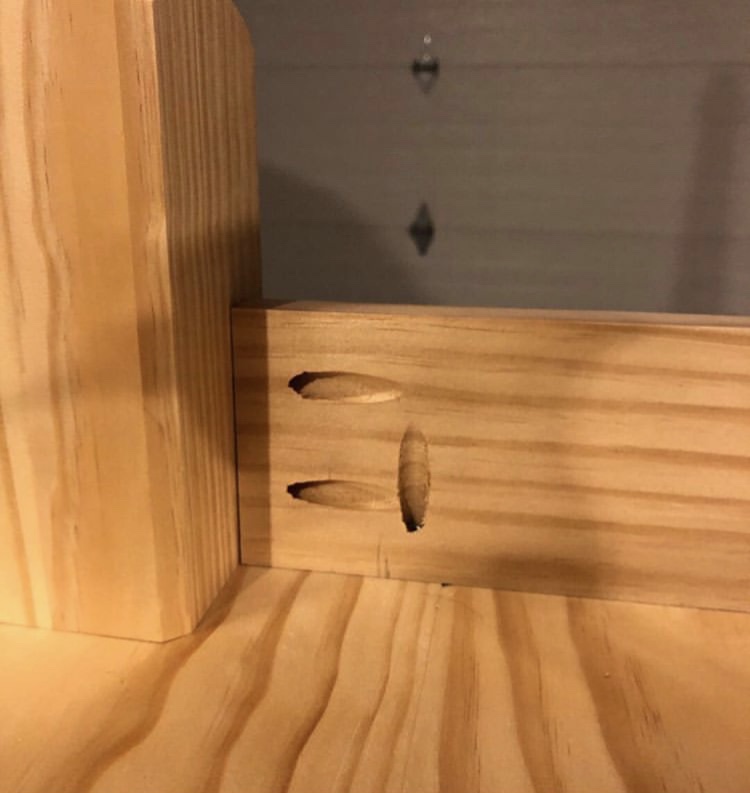
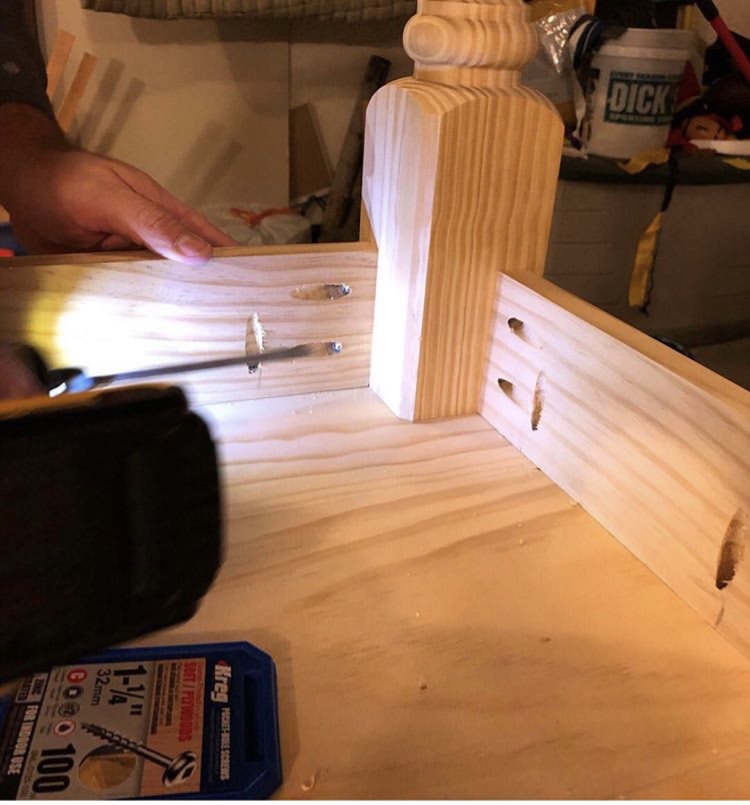
The table skirting should measure 1 1/2 inches from the edge of the tabletop. At this point, the table legs line up in each corner. From here, pre-drill pocket holes into the inside of the skirt boards. You will need three. Two-pocket holes will secure screws into the table legs, and a third will attach the skirt to the top of the table. Be sure the screws are long enough to secure the top without going all the way through. We added the correct size screws to our materials list.
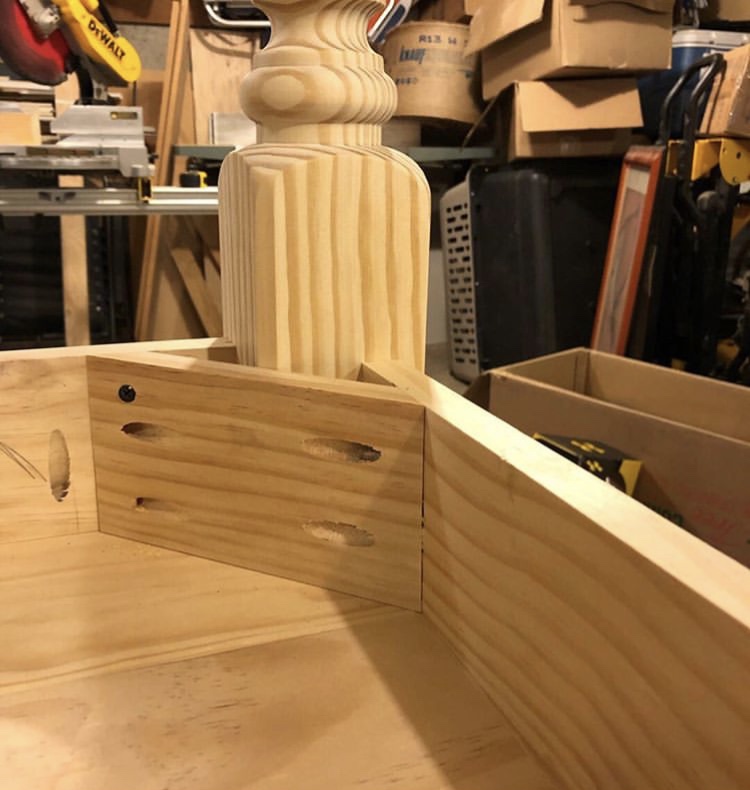
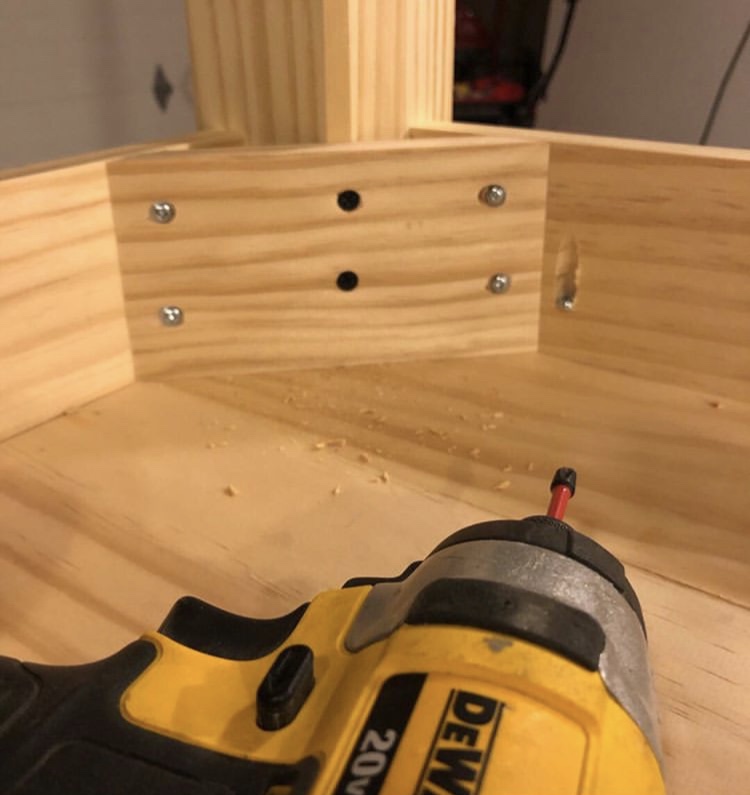
Before we finalize the assembly with screws, everything is put in place to make sure it lines up and measures out the way we want it. Then, we attach or join each of the corners with screws. We also secure screws in the middle of the boards going into the tabletop.
Stay with me. Your farmhouse table is almost built. In this step, we added a 1 X 4 board with a 45-degree angle cut to both sides. This board braces the table corners on the underside of the table. First, cut the board with a hand saw or a miter saw and attach it to the inner part of the skirting on either side of the table leg. In essence, we added a triangle of support around each table leg. To emphasize, adding this brace will ensure that the table has extra support where it takes the most pressure and will keep the boards from moving and making the table wobbly.
Preparing the Farmhouse-Style Table for the Finish
Step 3: Sanding
Adding finishing touches to a great-looking table can be overwhelming. The secret to a quality stain job is quality prep work. Let me walk you through an easy process for accomplishing just that.
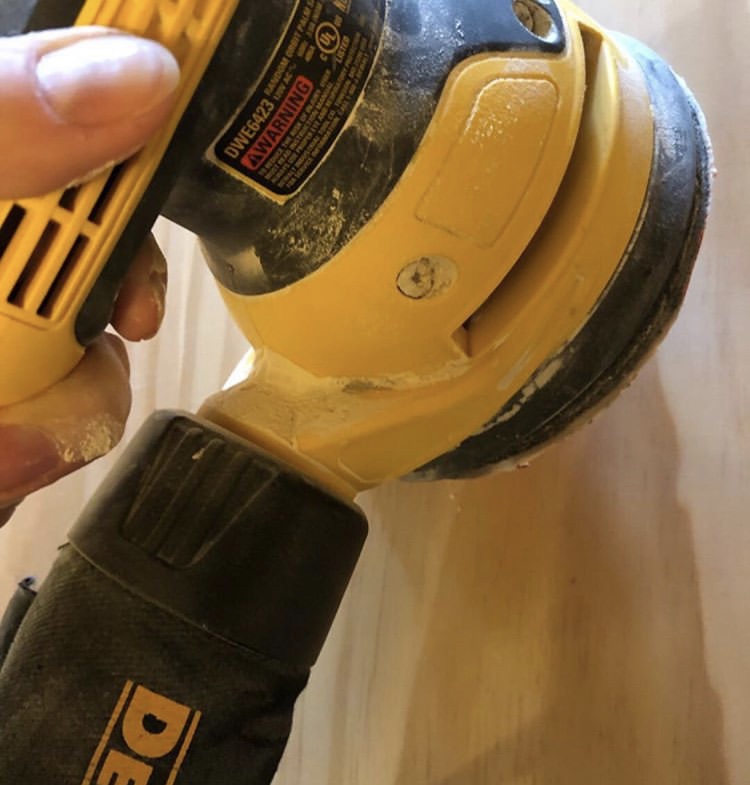
To begin, we sanded down the table to give it a baby-soft feel. In this case, a corded orbital sander was used. This type of sander is a favorite because it’s not overly aggressive on the wood. To be specific orbital sanders sand in a rotating motion preventing cross-grain marks.
Start with 50 grit sandpaper and sand the entire table. Follow up with a 220 grit paper to get that nice soft feel.
Step 4: Distressing (optional)
We can’t imagine the person who doesn’t love a table with a few battle wounds? While we concede that nicked and scarred furniture is not for everyone, no one can argue against the sense of story it adds to a table. This step is optional and reserved for those who desire the vintage look of an old farmhouse table.
Tips for Distressing
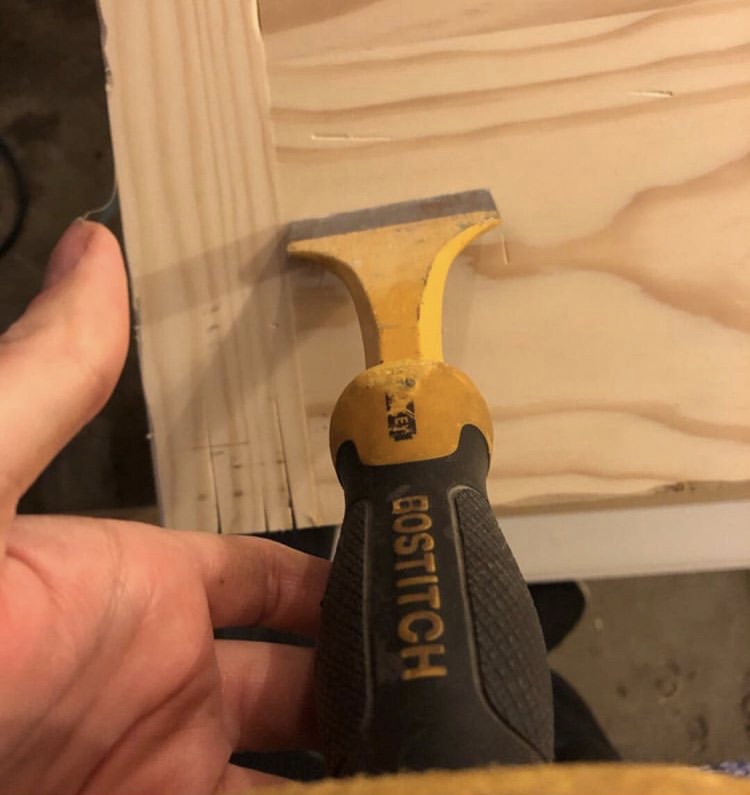
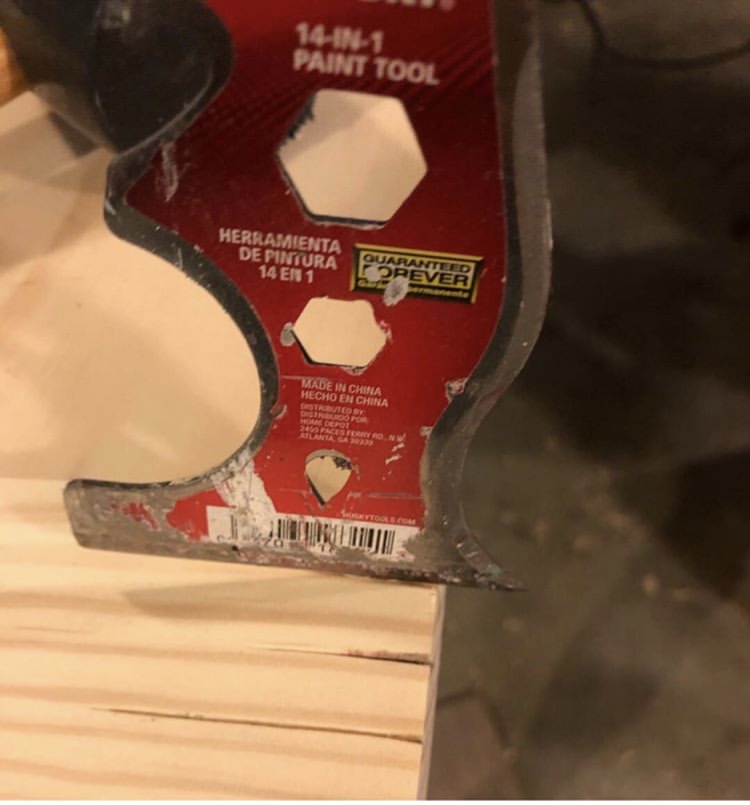
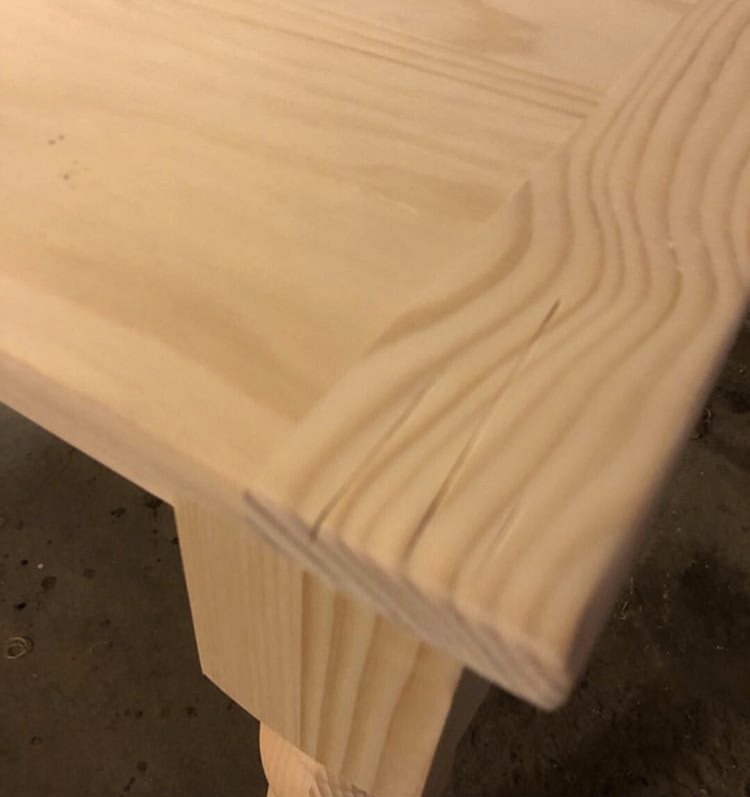
Before beginning, try out your distressing techniques on a scrap board to decide which distressing techniques give you the desired look. We used a 14 in 1 painting tool, chisel, nails, a hammer, and a sander to distress our table. For us, a light distressing was enough. Then, we chiseled a few nicks and grooves in places where the table would have taken natural wear over time. At the same time, we used a chisel to shave off the sharp edges for a worn look. Next, we chiseled out a few grooves in the tabletop.
Here and there, we gently hammered the painting tool into the ends of the wood along the grain to crack the wood just enough to create an authentically beautiful look of aged wood. We also used a hammer and nails to add pin hole nicks and grooves. Finally, we sanded down the blemishes and corners to give them a rounded-worn look.
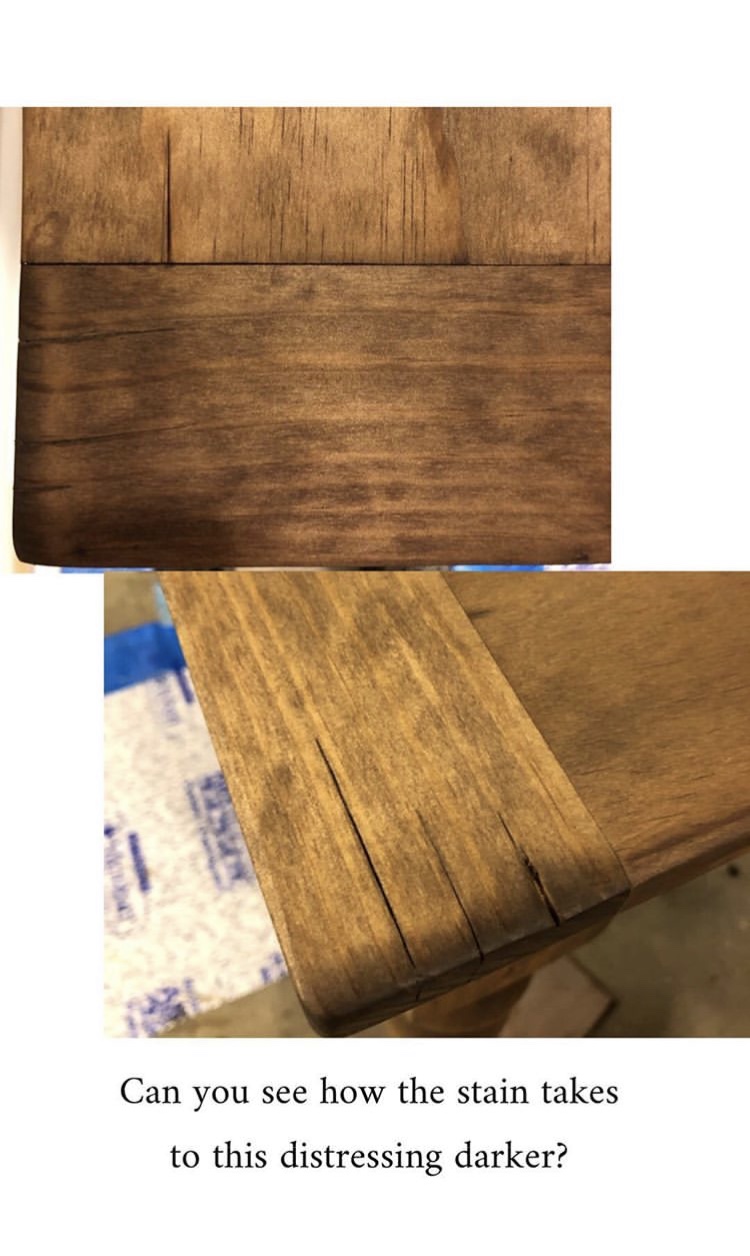
*Note: Any place you add distressing can take to stain differently (it usually ends up saturating darker), so keep that in mind when distressing.
Staining the Farmhouse Table
Step 5: Stain
Stain scares people. It can be hard to work with and obtain the look imagined. Worry not. Here’s how to do it yourself.
Firstly, clean your surface with a damp, not wet, rag and allow for drying. Testing out stain choices on a scrap piece of wood is a huge step to getting the desired look. Stain absorbs differently in different grain patterns and different woods. Therefore, testing color options will prevent mishaps. Expressly, we wanted an aged look on our table, so we used a custom mix of stains.
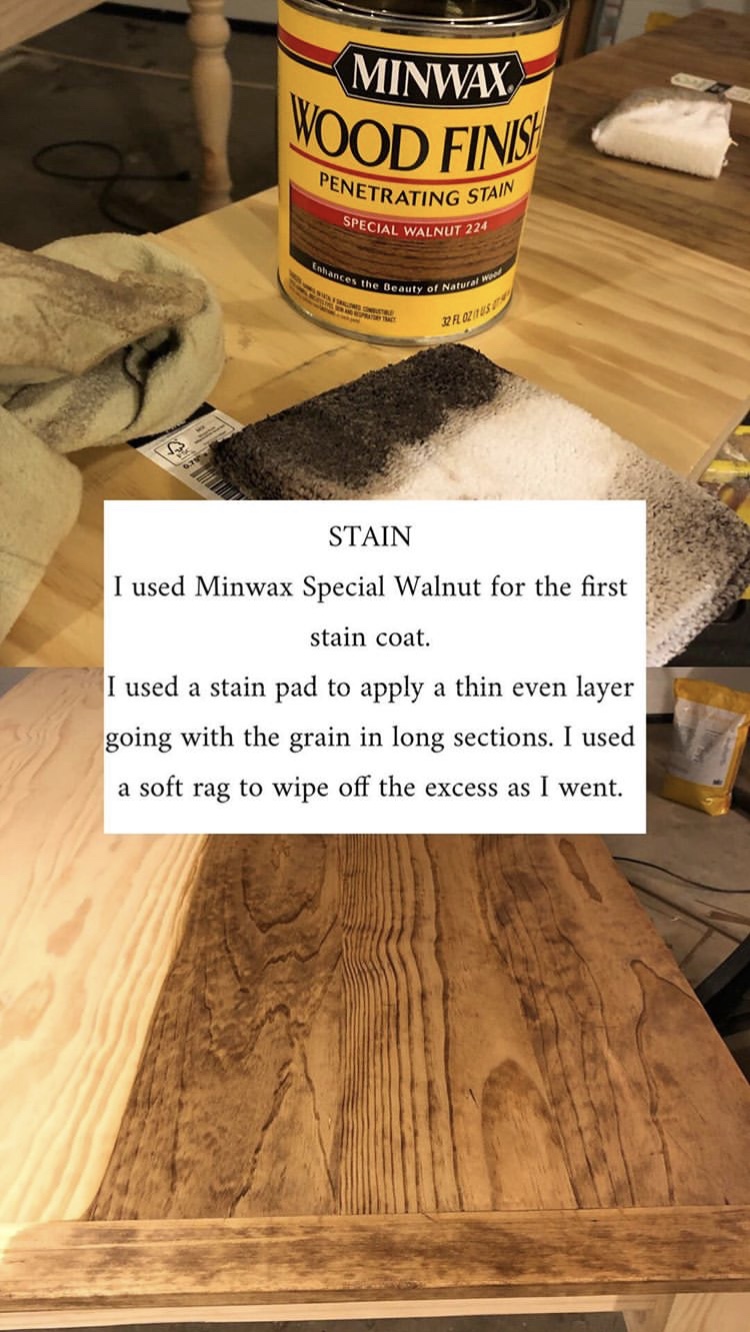
Stain Round 1:
In this step, we used Minwax Special Walnut for the first coat of stain coat. Specifically, we applied it in a thin layer with a stain pad going with the grain in long even sections. Then, we used a soft cotton rag to wipe off the excess as you go. Let this dry for the recommended time on the can.
Stain Round 2:
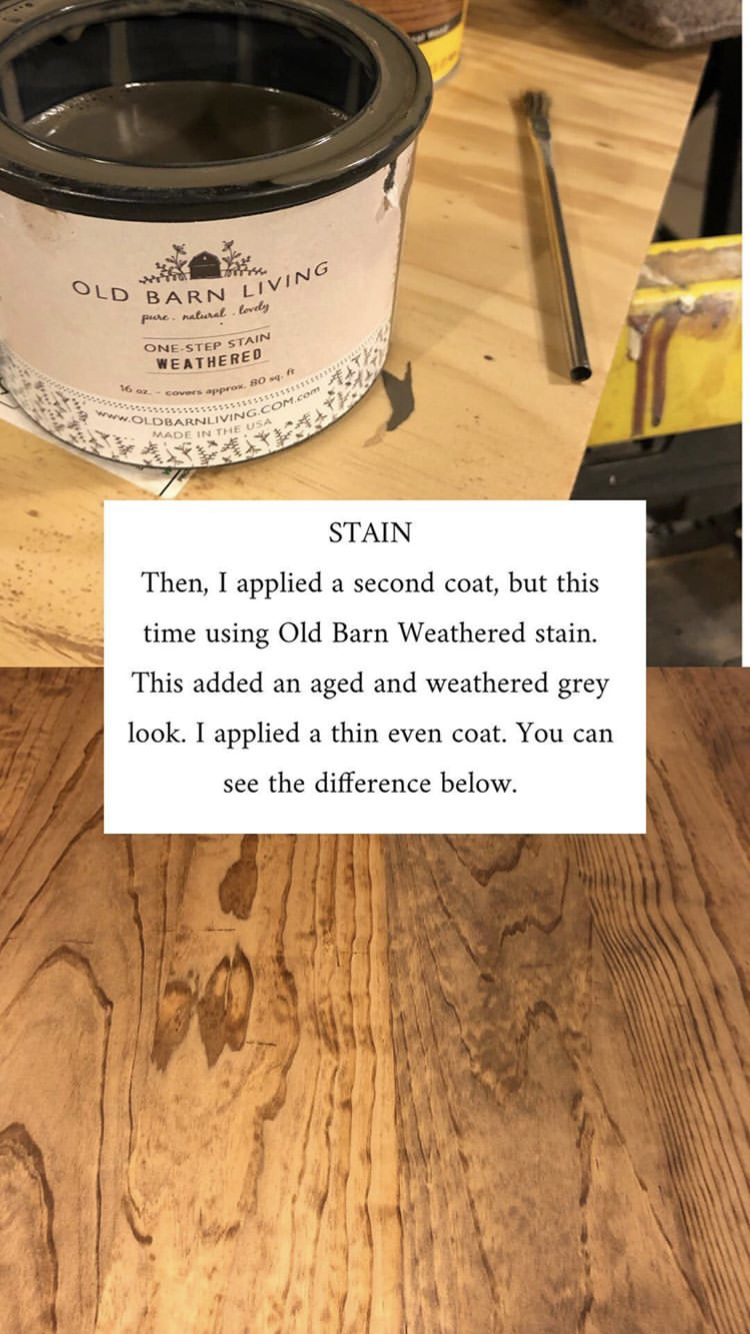
Once the first coat of stain had dried entirely, we applied a second coat in a different color stain. Namely, we used Old Barn Living-Weathered stain. It has a grey pigment that added a beautiful aged and weathered grey to the wood. We applied this in a fine even coat as well. Finally, we let it dry for the recommended time on the can.
Finishing the Farmhouse Table
Step 6: Finish
We realize this is a lot to take in, but trust me. The result is so worth it.
I remember standing in the aisle of finishes feeling overwhelmed and lost. We’ve worked out all the details, my friends, so no worries. Follow these simple steps for a glorious and flawless finish.
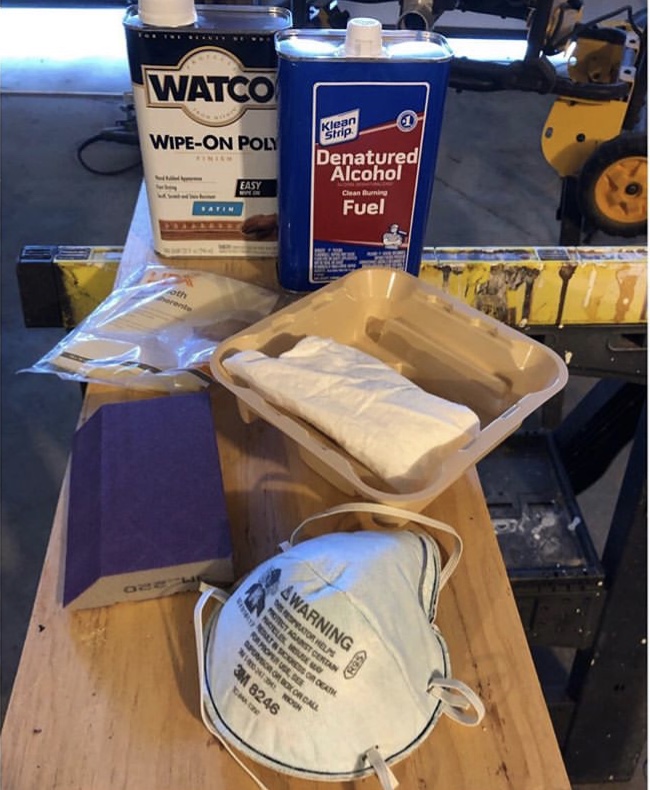
Finish materials:
-oil based wipe on poly
-cotton cloth
-tack paper
-denatured alcohol
-grit 220 sanding block
-latex gloves and a fume mask
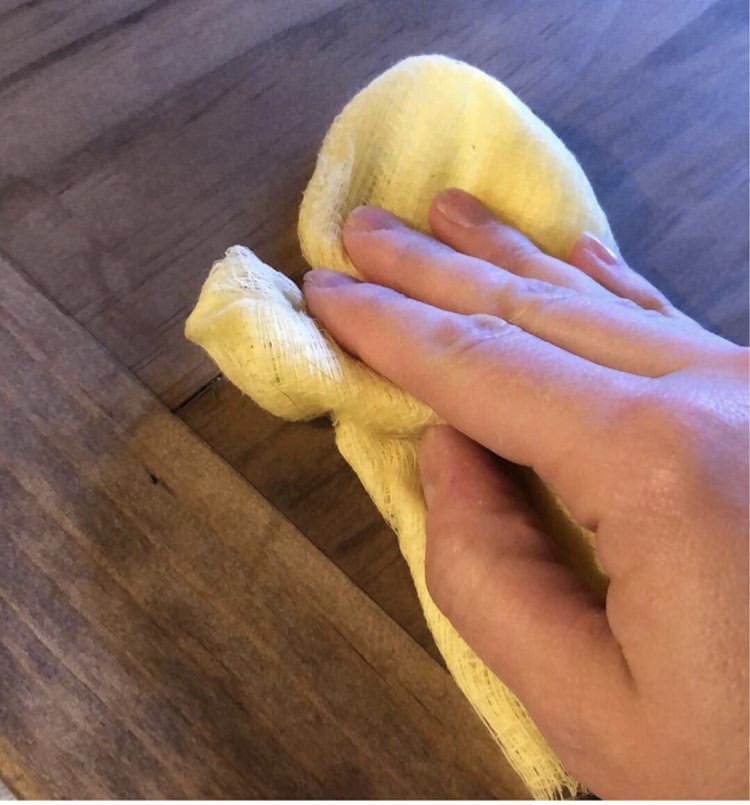
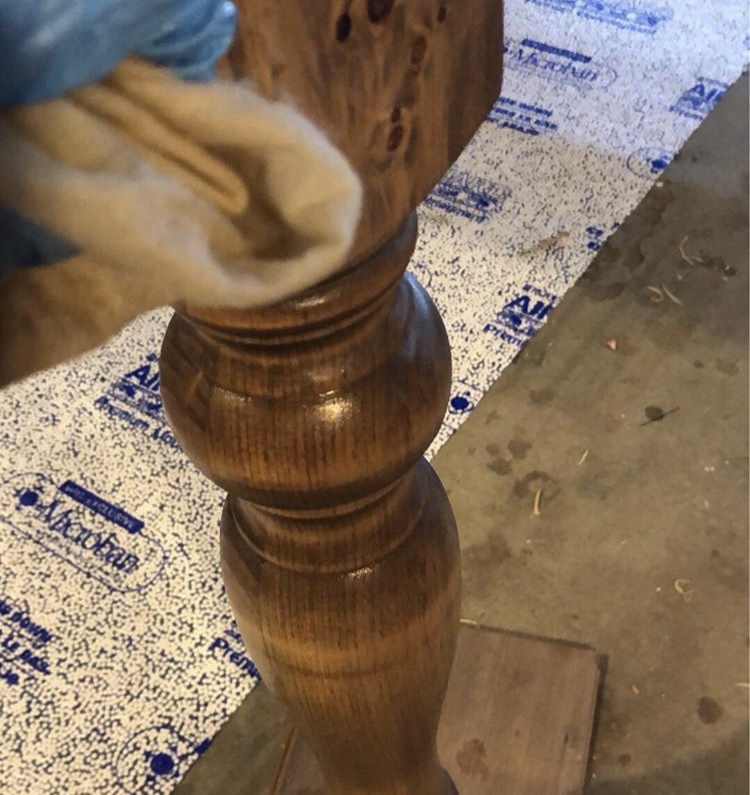
To begin, we took the tack cloth and rubbed it lightly across the surfaces and legs of the table to wipe off any excess dust.
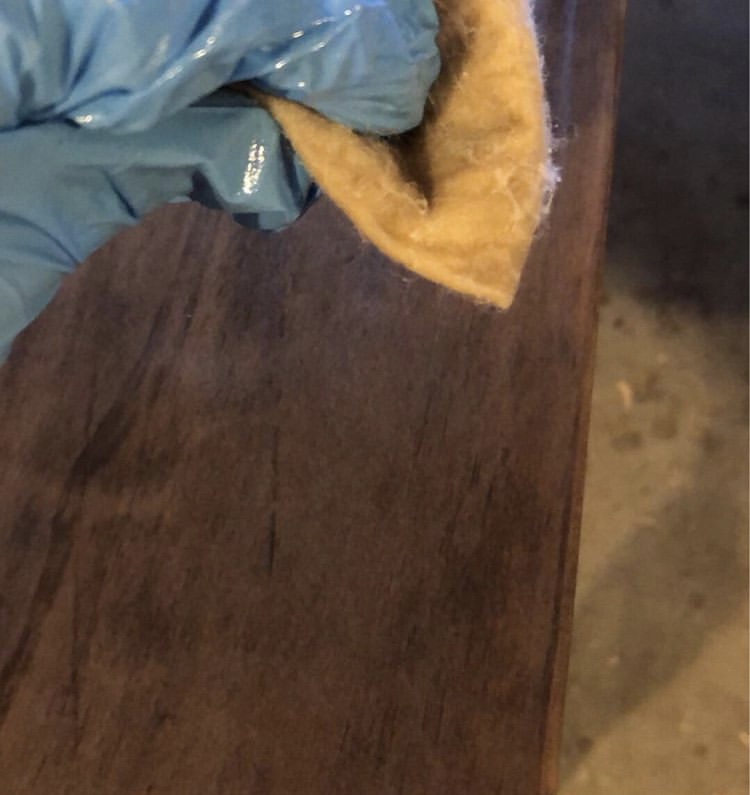
Next, we used a lint-free cloth rag to apply my poly. Most hardware stores carry bags of cotton rags for purchase. To start, fold the rag so that you have a smooth surface. Then, pour the poly into a container, dip your cloth rag into the poly, and spread it on the table. Be sure to apply the poly in long continuous strokes, one right after another, always keeping a wet edge. Thin coats level out better than thick coats, so don’t apply too much at a time.
We used the same process on the sides and legs while making sure to apply a thin coat of poly into the grooves of the legs. It’s critical to watch for drips and runs on the sides and legs.
Each coat of finish takes four hours to dry. In between coats, we lightly buffed the table with the 220 grit sanding block. Then we cleaned the dust from buffing with denatured alcohol.
Most oil-based wipe-on polys call for three coats. We added an extra coat to tabletops to ensure it’d be dually protected from years of hard wear. Once this has been cured, it will be durable and food-safe.
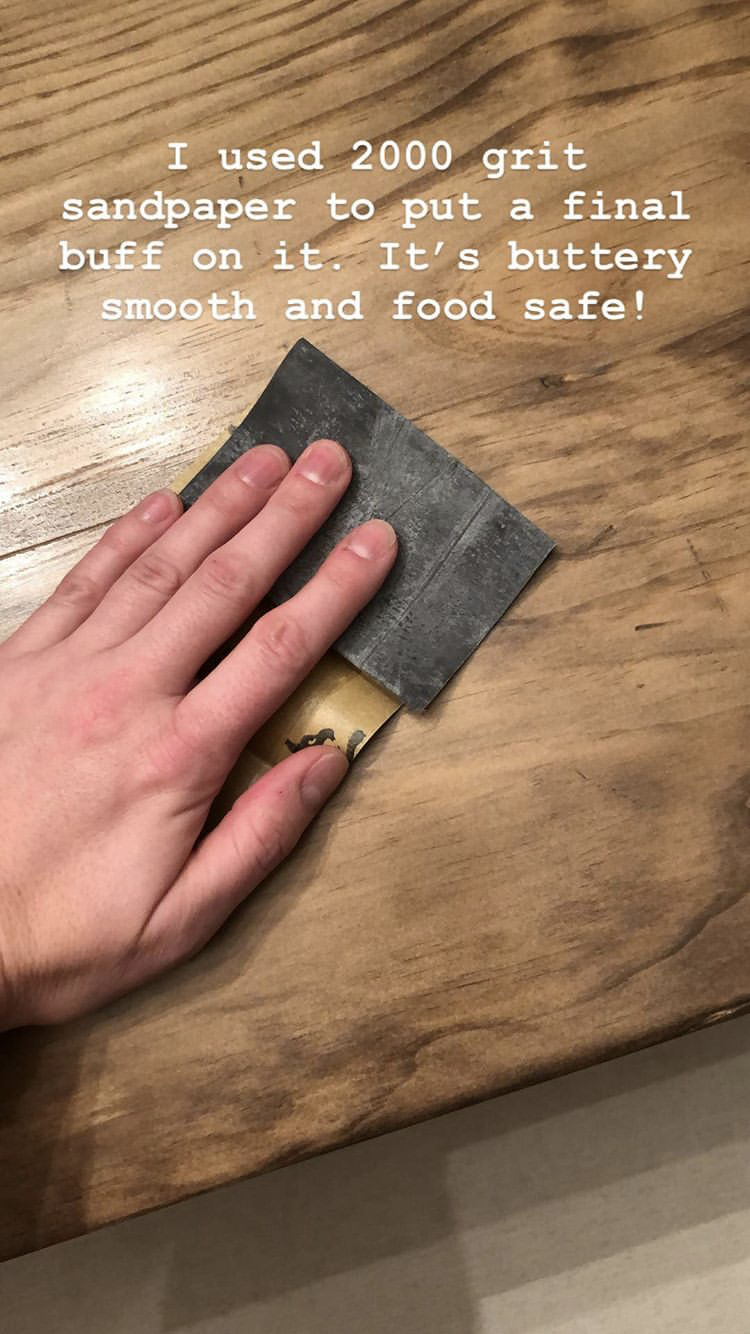
Adding a Smooth Finish to the DIY Farmhouse Table
We finished off the table by giving it a buffing with 2000 grit sandpaper. This made it buttery smooth and continues to be so satisfying to run your hands across!
Final Thoughts on the DIY Farmhouse Table
Hopefully, this tutorial gives you the information and confidence it takes to make that next step and build your own table. We absolutely love ours and adore that it was made by us making it a true family heirloom to be handed down. Having had zero experience with making our own table and can’t believe WE did this! You can do it too. I can’t wait to hear how it turned out.
See how we styled our farmhouse table for fall and winter.
*This post contains some affiliate links for your convenience. I make a tiny portion of the sale with no additional cost to you whatsoever. Click here to read my full disclosure policy. Thank you for supporting this blog.*
Love your gorgeous table, Tammy! Thank you for sharing all the details!
Thank you! I appreciate the supportive feedback!
Thank you so much for sharing how you built this. It’s a lovely table.
I’m so glad you found it helpful. We’re loving it. Thank you so much for the kind words.