

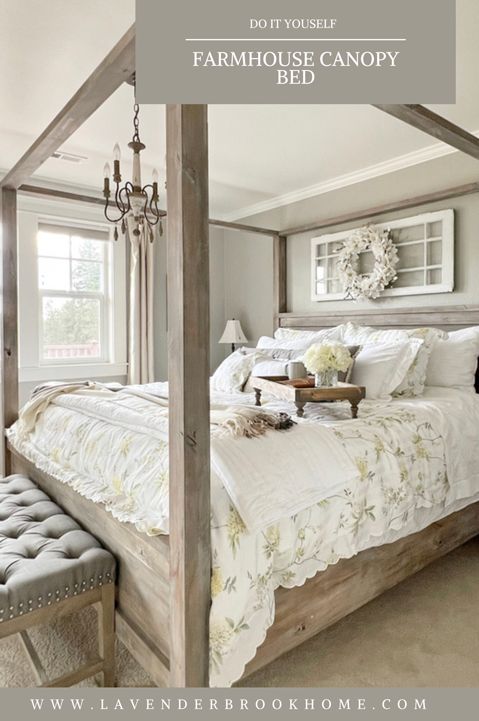
DIY Pottery Barn Dupe Canopy Bed
Build your own DIY Pottery Barn dupe canopy bed with this step-by-step tutorial and get the grand look for a fraction of the price. This simple farmhouse-style version of the timeless and trendy canopy bed adds a dramatic centerpiece and focal point to any room.
Canopy Bed & Timeless Style
Before the days of centralized heating, the canopy bed offered a great way to conserve heat and provide privacy. In contrast, today’s canopy beds are more commonly used for their style statement than for their practicality. We’ve seen several incarnations of these beds throughout the years. Historically, canopy beds came with heavy curtains, but contemporary beds are open and airy. In either case, canopy beds offer so much to love.

From Pottery Barn to DIY
We fell in love with the Pottery Barn farmhouse canopy bed the first time we saw it. It expressed the perfect warm rustic nod to the heirloom canopy bed with the modern charm of pared lines. We loved everything about it but the price. Fortunately, the style was simple enough to provide building opportunities using basic building lumber found on the shelves at lumber stores.
Since we were ready to make the jump to a king-sized bed, we decided to make the canopy bed a DIY project. After taking screenshots of the Pottery Barn bed, we deconstructed its design. All in all, the plan required basic lumber, simple cuts, and was priced at $200. However, we chose higher-quality knotty alder for our build. As a result, the price came in around $500 instead of $200. Still, since we saved about $1500, we still came out ahead and were able to build the bed in one weekend. The finish work took a little longer to wait for drying and curing times. In any case, the work and patience were worth it. Our bed is made of high-quality wood and looks exceedingly better at ¼ of the price.
How to Build a Canopy Bed
Tools:
- Tape measure
- Safety glasses
- Square
- Saw – table saw or circular saw with a guide
- Miter saw
- Kreg jig
- 2-1/2″ pocket hole screws
- Drill
- Wood Glue (optional clamps)
- Brad Nailer (or hammer and countersink)
- Sander and sandpaper
Here 2 x 4 -inch boards represent an actual 1 1/2″ milled and 3″ ripped board. Therefore, measuring an actual 1 1/2 X 3-inch board.
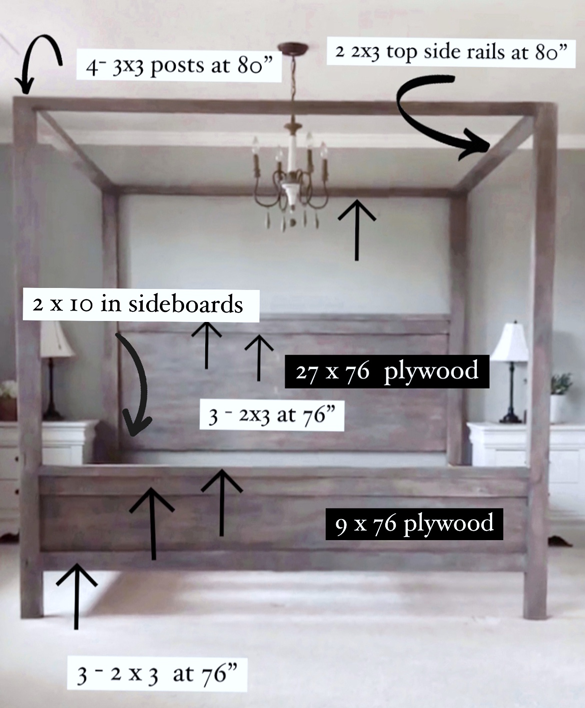
King Sized Bed Cut List (76″ x 80″)
Bed posts:
- 4 – 4 x 4-inch posts at 80″ (we did 4- 2 x 6 boards, glued them together, and ripped them down to 3 x 3-inch posts making an actual measurement of 1 1/2 x 3)
Headboard:
- 2- 2 x 4-inch boards at 76″ (we ripped the 4-inch sides down to 3 inches to match the posts making an actual measurement of 1 1/2 x 3 )
- 1- 1 x 3-inch trim board at 76″
- 27 x 76 -inch 3/4 inch plywood slat (ours is with an alder veneer)
Footboard:
- 2- 2 x 4-inch boards at 76″ (we ripped the 4-inch sides down to 3 inches to match the posts making an actual measurement of 1 1/2 x 3)
- 1- 1 x 3-inch trim board at 76″
- 9 x 76 -inch 3/4 inch plywood (ours is with an alder veneer)
Siderails:
- 2- 2 x 4-inch boards at 80″ (we ripped the 4-inch sides down to 3 inches to match the posts making an actual measurement of 1 1/2 x 3)
- 4 – 2 x 6- inch boards at 80″ (we ripped ours down to 5 inches and glued two together for each side)
Slat Mattress Supports:
- 3- 2 x 4-inch side and middle cleats at 80″ (we used scrap boards measuring 1 1/2 x 2 1/2)
- 2- 2 x 4-inch head and foot cleats at 76″(we used scrap boards measuring 1 1/2 x 2 1/2)
- 10 – 1 x 4 inch slats at 76″
- 4 – 2 x 4 center legs at 15″ each
Cutting the Boards
The most accurate saw for cutting most boards is a compound miter saw. Alternatively, you can also use a circular saw and a guide, but take extra steps to ensure your cuts are square. On the other hand, the plywood slats should be cut with a table saw or a circular saw and a guide to ensure straight square cuts.
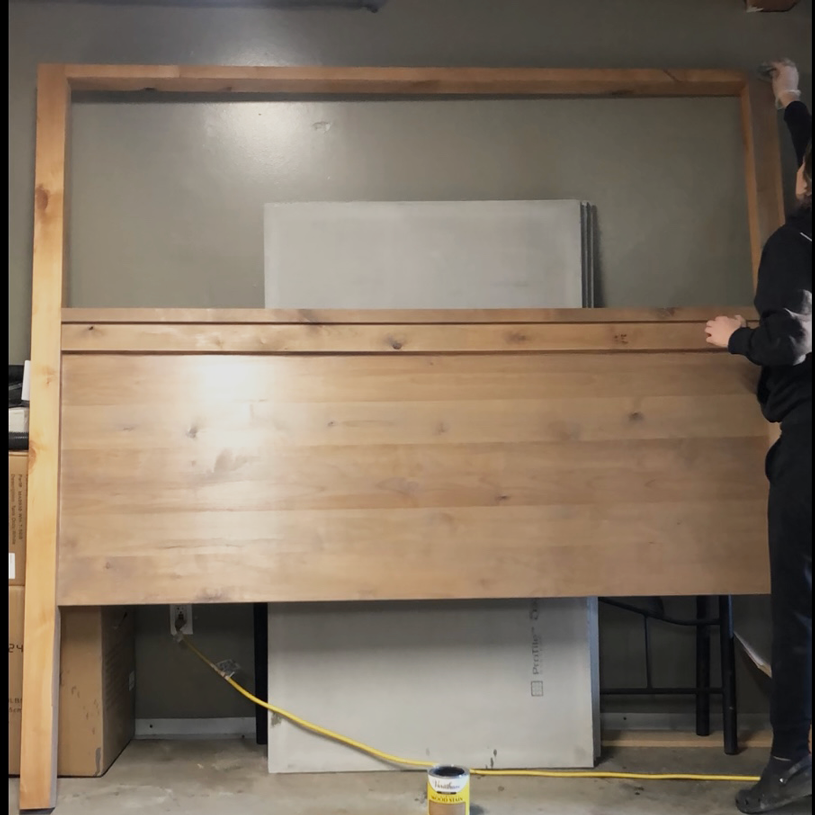
The King Headboard
Beforehand, gather all supplies for the headboard. Specifically, these include:
- 2 posts (4 x 4 or 3 x 3)
- 2- 2 x 4-inch boards at 76″ (or 1 1/12 x 3 for 3 x 3 posts)
- 1- 1 x 3-inch trim board at 76″
- 27 x 76 -inch 3/4 inch plywood slat
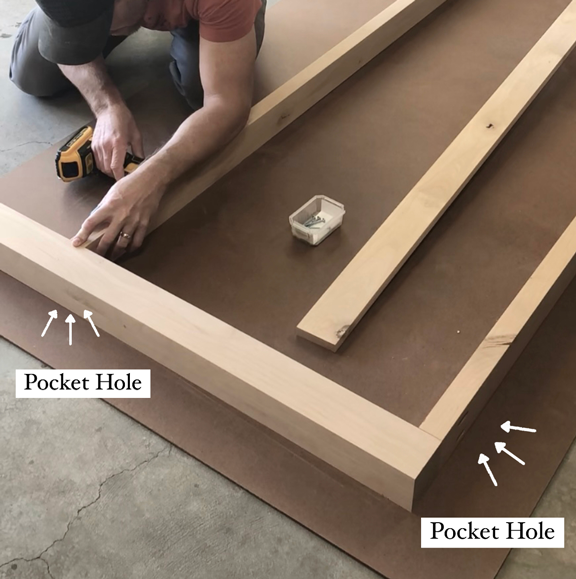
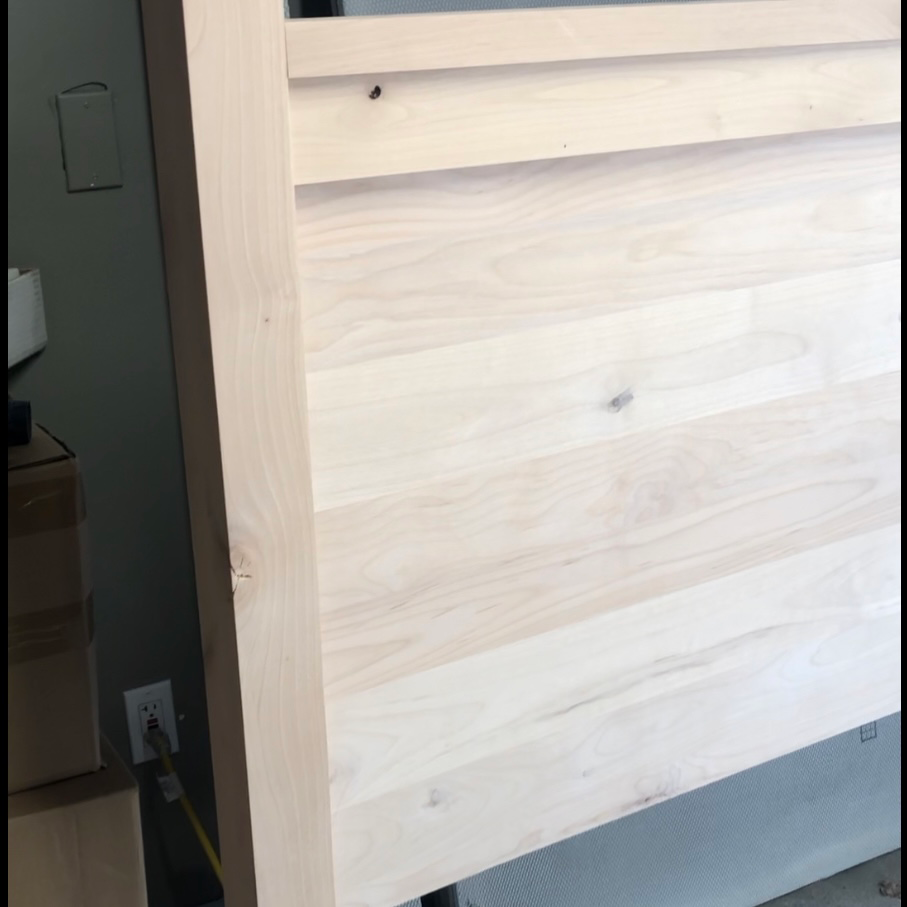
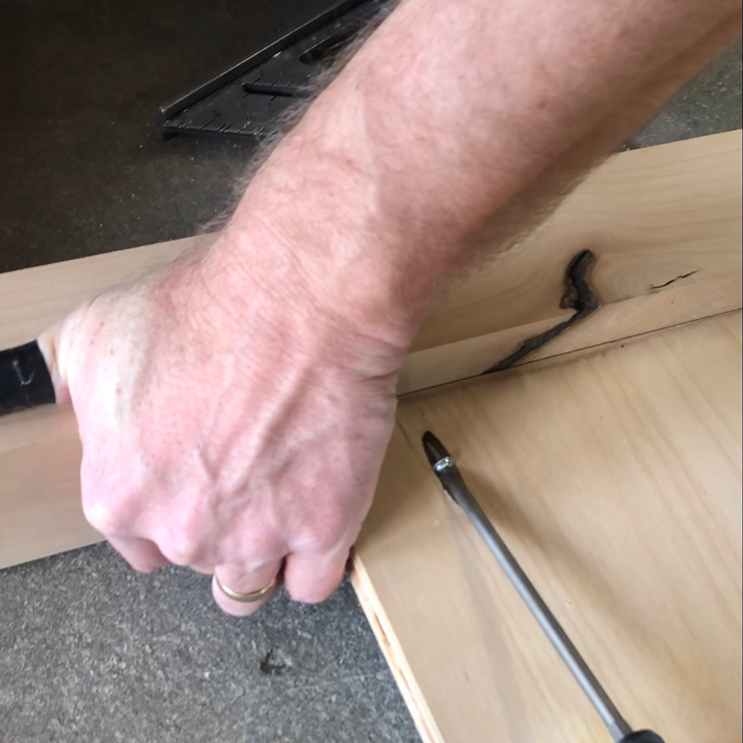
Begin by drilling two 1-1/2″ pocket holes with the Kreg Jig on each end of the two 2x4s (or 1 1/12 x 3 for 3 x 3 posts). More specifically, the jig guides your screw from one piece of wood into the other at an angle, resulting in a stronger joint with a cleaner appearance.
Next, use a square to square the corners and attach boards to the posts with 2-1/2″ pocket hole screws. Inexact, screw the pocket holes on the top of the outside board and underneath the inner board to keep the holes hidden. At this point, you should have a basic rectangular frame at the end of the bedposts.
The top of the frame to the inner board (or headboard top rail) measures 28 inches and forms the upper portion of the canopy frame. Beneath the headboard top rail is where the plywood slat rests. Thus, setting the headboard portion of the bed to measure 30 inches.
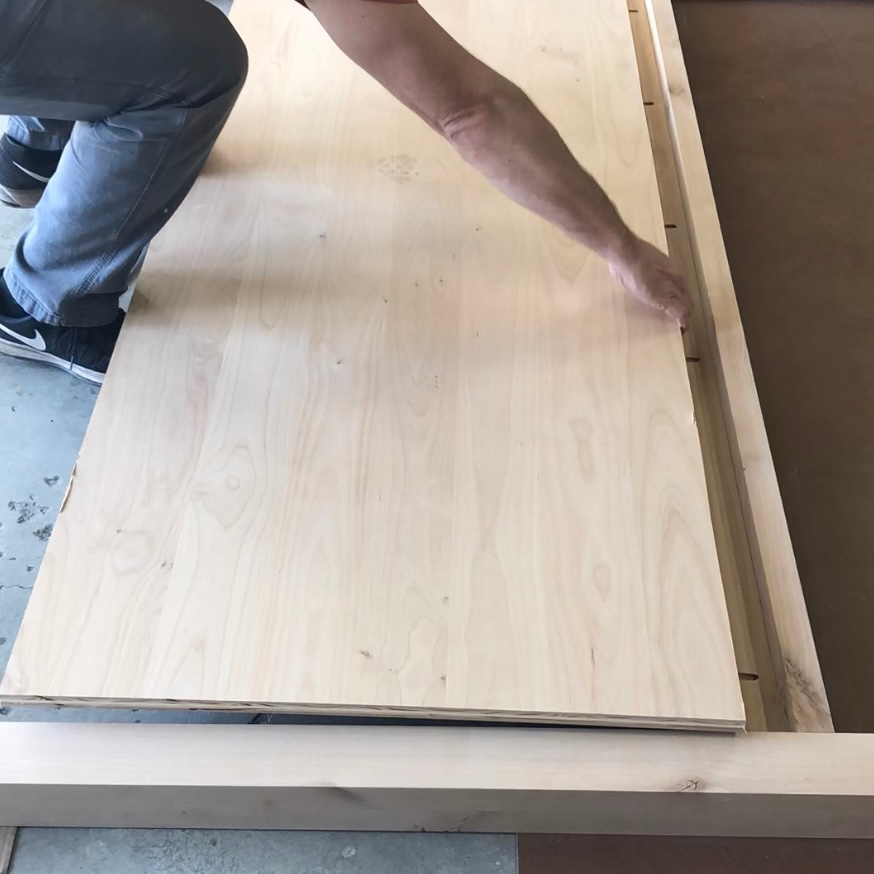
After the frame is secured, add the 3/4 inch plywood slat cut to 27 x 76 inches. Start by testing the fit inside the frame and then follow by drilling 3/4″ pocket holes on the backside of the headboard panel. In this case, 1-1/4″ pocket screws secure the plywood to the posts and face the wall. Specifically, drill four holes evenly spaced.

Finally, screw from the backside to attach a 1×3 inch trim piece to the top of the headboard panel just under the headboard top-rail.
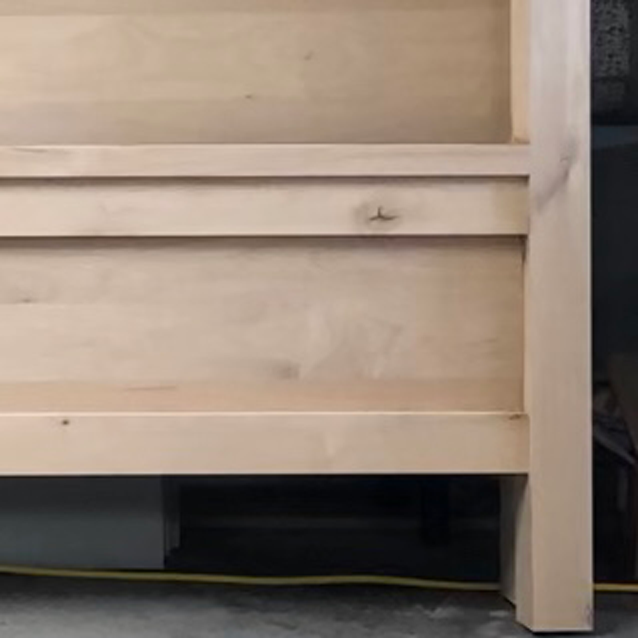
The King Footboard
Once the headboard is built, the footboard is built using the exact same process. Here are the supplies needed for the footboard:
- 2 posts (4 x 4 or 3 x 3)
- 2- 2 x 4-inch boards at 76″ (or 1 1/12 x 3 for 3 x 3 posts)
- 9 x 76 -inch 3/4 inch plywood panel
- 2- 1 x 3-inch trim board at 76″
Again, position pocket screws and screws on the backside or towards the mattress in this case. Additionally, attach a second 1×3 inch trim piece to the bottom of the footboard panel. Altogether, two trim pieces are added to the footboard top and bottom.
The Siderails
The side rails for the canopy bed consist of the bottom side rails just under the mattress and the top rails as part of the canopy frame. In contrast to the steps above, these pieces will be cut and prepared for later construction within the bedroom. Specifically, this step requires:
- 2- 2 x 4-inch boards at 80″ for the top rails (we ripped the 4-inch sides down to 3 inches to match the posts making an actual measurement of 1 1/2 x 3)
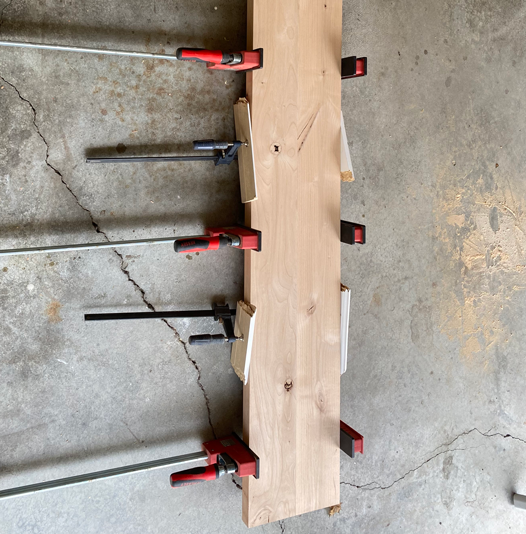
- 4 – 2 x 6- inch boards at 80″ for the bottom rails (we ripped ours down to 5 inches and glued two together for each side)
Firstly, drill pocket holes into the upper side of the top 80 inch rails.
Next, rip two 2 x 6-inch boards down to 5 inches and glue them together to make a 2 x 10-inch board measuring 80 inches long. Conversely, a 2 x 10-inch board can be used if available. Finally, drill two pocket holes on the inside of each end and set all side rails aside for later construction.
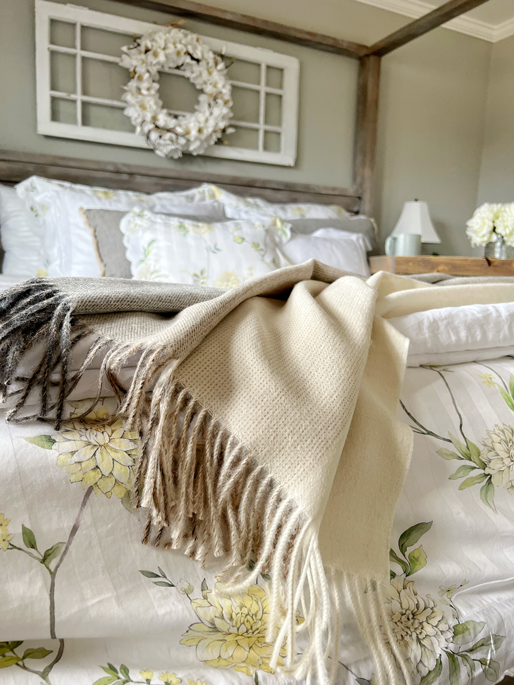
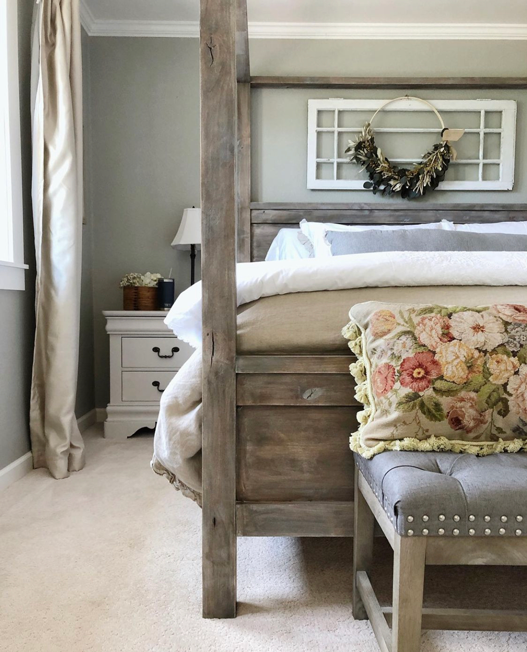
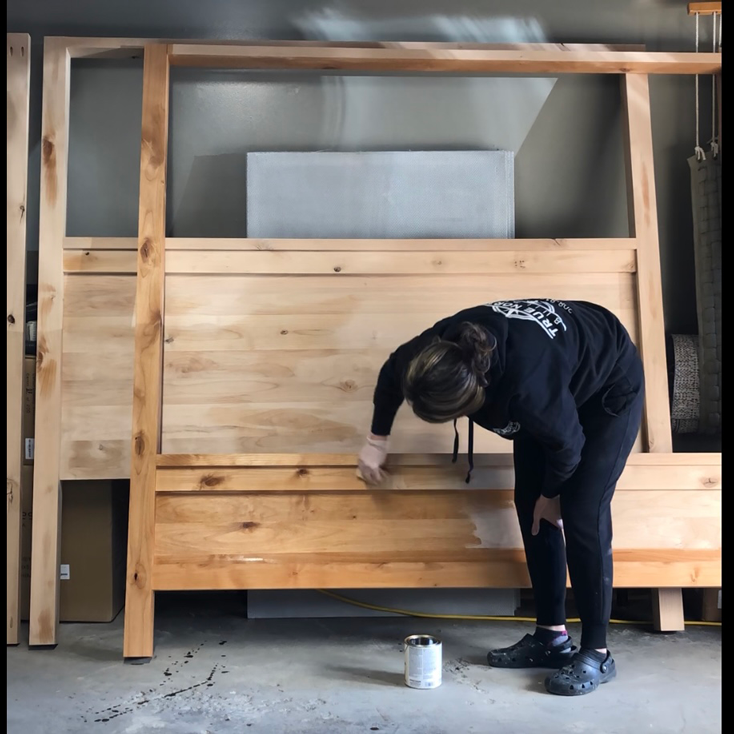
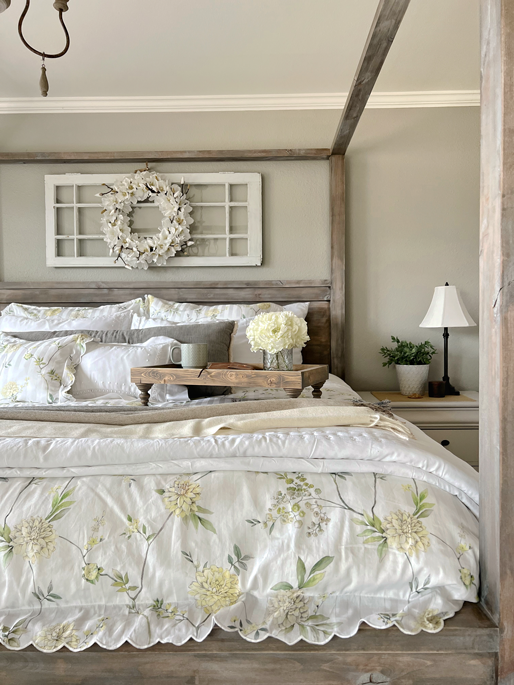
Staining the Bedframe
At this point, we stained our bed frame. Of course, wood finishes are a personal preference, so really any stain could go. Since I wanted the weathered, soft look of the Pottery Barn bed, I knew my stain process would be multilayered. Subsequently, I sanded and cleaned the wood with mineral spirits and prepped it Varathane pre-stain conditioner.
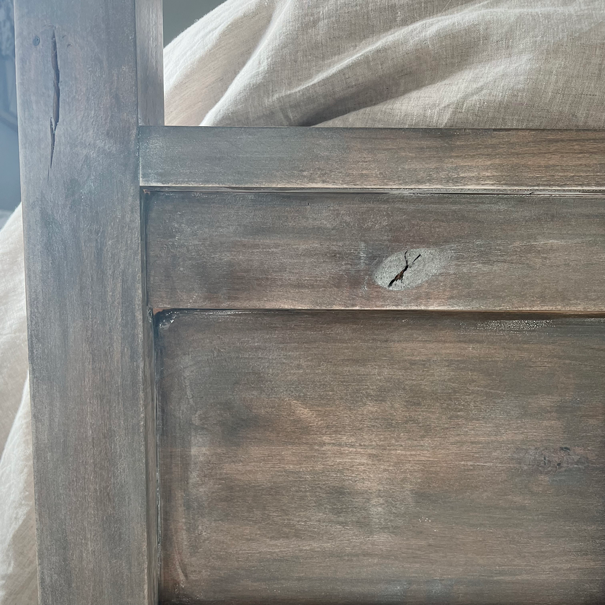
Then, I used Varathane Weathered Gray as a light ashy gray base and followed it with Varathane Briarsmoke to add a deeper color.
Regardless of the beautiful color, it still lacked the weathered driftwood look. This is why I added WOCA Driftwood White Lye, which used to give wood a two-dimensional weathered patina. It wipes on, dries, and then rubs off for the desired look. Once I achieved the desired look, I finished the piece with a few coats of wipe-on poly. To be sure, this process took multiple days to allow for curing and drying times.
Assembling the Canopy Bed
At last, the time has come to assemble the bed. Start by moving the headboard, footboard, side canopy rail, and side rails to the room and laying it in position. Just as pocket screws attach the plywood to the posts for the headboard and footboard, they also connect the side rails to the posts. Lastly, assemble the bed by attaching the canopy side rails and lower side rails with pocket screws.
Supporting the Mattress
- 3- 2 x 4-inch side and middle cleats at 80″ (we used scrap boards measuring 1 1/2 x 2 1/2)
- 2- 2 x 4-inch head and foot cleats at 76″(we used scrap boards measuring 1 1/2 x 2 1/2)
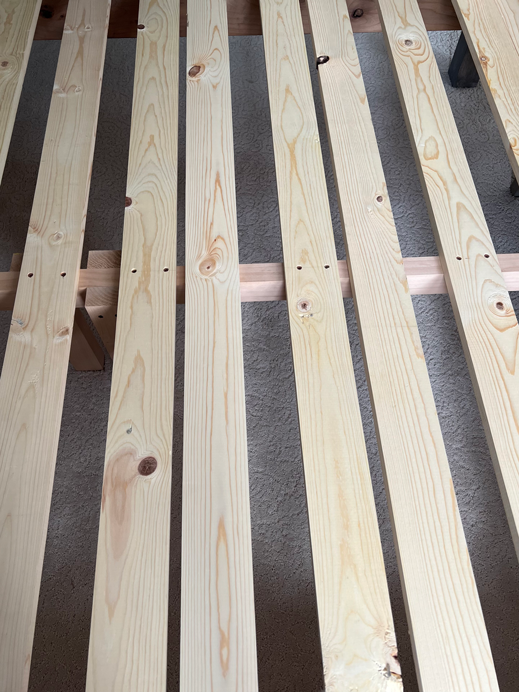
- 10 – 1 x 4 inch slats at 76″
- 4 – 2 x 4 center legs at 15″ each
Securing the mattress supports is a critical part of building a long-lasting bedframe. With this intention, cleats, cross slats, and center legs are necessary to distribute the weight evenly. Therefore, attach cleats to the inner side of the side rails, footboard, and headboard. Center the legs in the center of the bed frame and the center under the headboard.
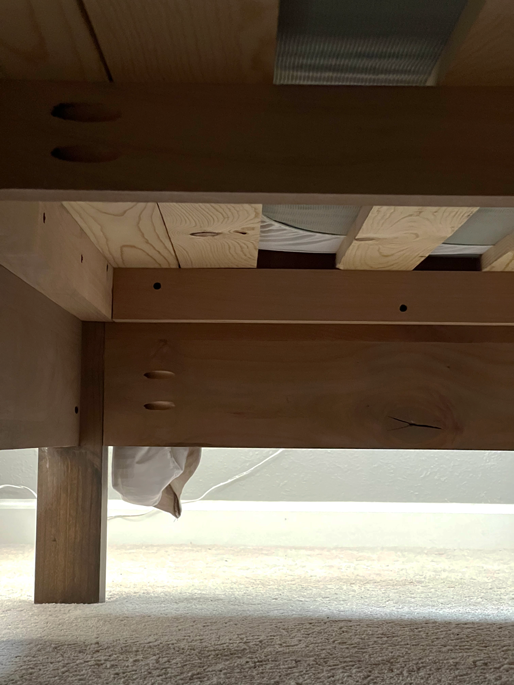
Finally, secure the 1x 4-inch slats to the center legs and cleats with screws from side rail to side rail. This will create a solid base for the mattress.
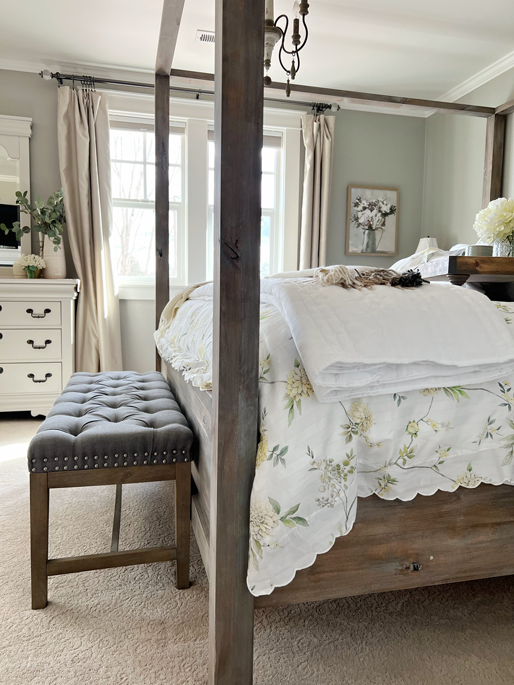
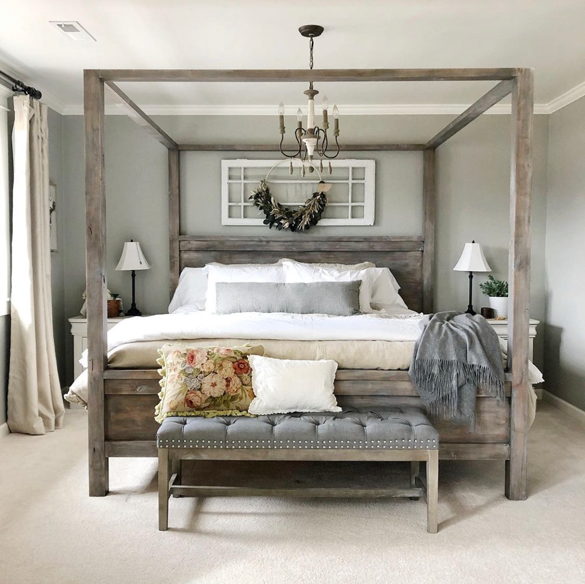
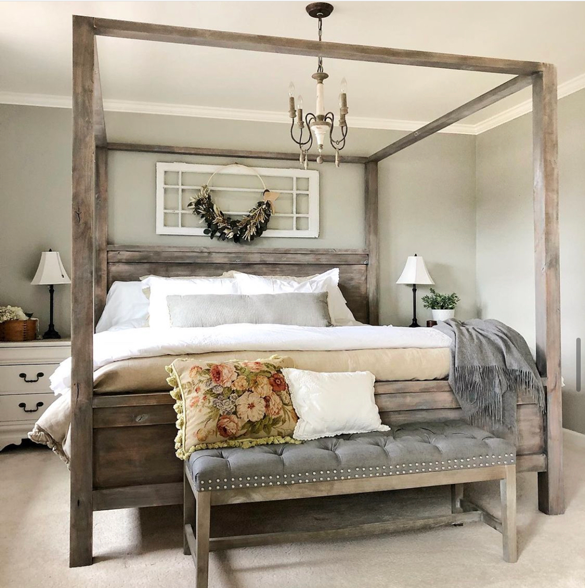
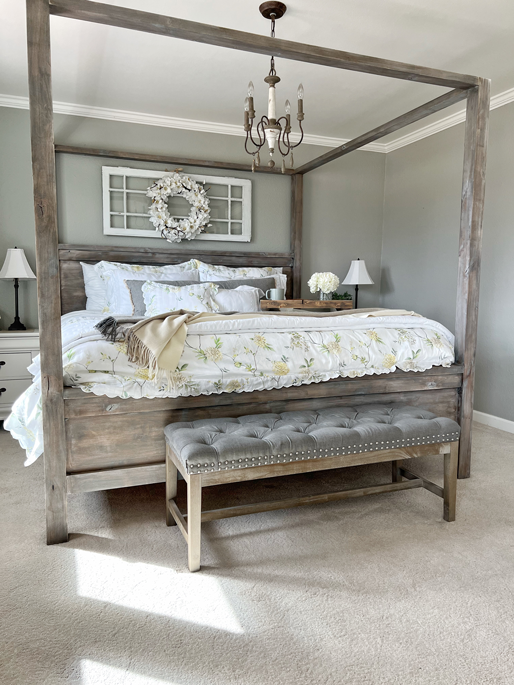
DIY Pottery Barn Canopy Bed
We are absolutely thrilled with our DIY Pottery Barn Dupe Canopy Bed. This bed is the most solidly built bed I have ever slept in. Thus, proving that doing it yourself can produce better quality. Moreover, we were able to do more than simply replicate the finish. Instead, we actually achieved a higher quality finish job. Our bed is made of solid knotty alder and has a sentimental handmade priceless value. Still, $500 is a beautiful value compared to the commercial counterpart of $2K. In essence, we more than achieved the goal. We surpassed it.
Hopefully, you can use this DIY Pottery Barn Canopy Bed to build your own treasured version of it. As always, thank you so much for joining us here in sharing ideas and inspiring some home love. Feel free to leave comments or ask questions below. For more DIY build check out my blog post on How to Build a Farmhouse Table or the one about How to Build a Porch Swing.
You can also find the plans for building a similar bed to this in other sized from the amazing Anna White here: Farmhouse Canopy Bed Frame.
~Get behind the scenes of the blog by joining me on Pinterest and Instagram.~
*This post contains some affiliate links for your convenience. I make a tiny portion of the sale with no additional cost to you whatsoever. Click here to read my full disclosure policy. Thank you for supporting this blog.*
0 Comments