
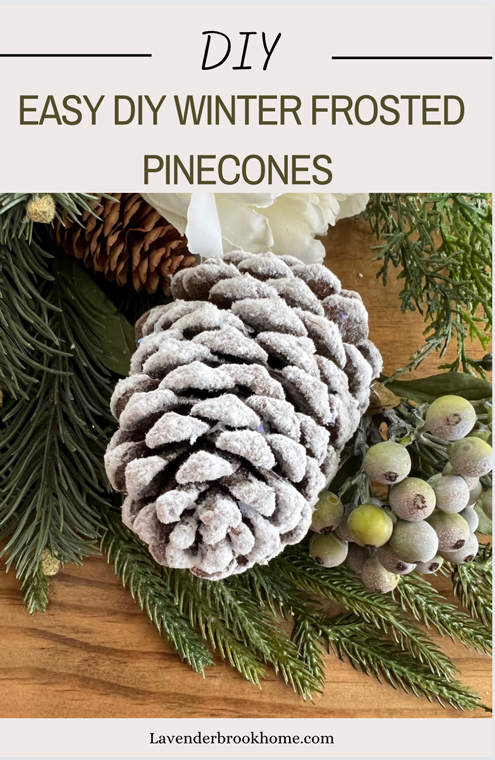
Easy DIY Winter Frosted Pinecones
Looking to add some winter warmth to your home decor? Look no further than these easy DIY winter frosted pinecones!
With just a little paint or flocking, you can transform ordinary pinecones into a beautiful and unique decoration. Not only are they easy to make, but they also bring the natural elements of the outdoors into your home. Decorating with natural elements such as pinecones can have a calming and grounding effect on your decorated spaces.


Natural Decor Accents
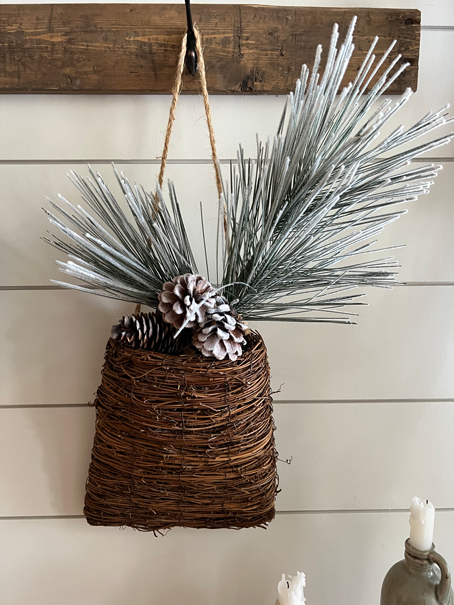
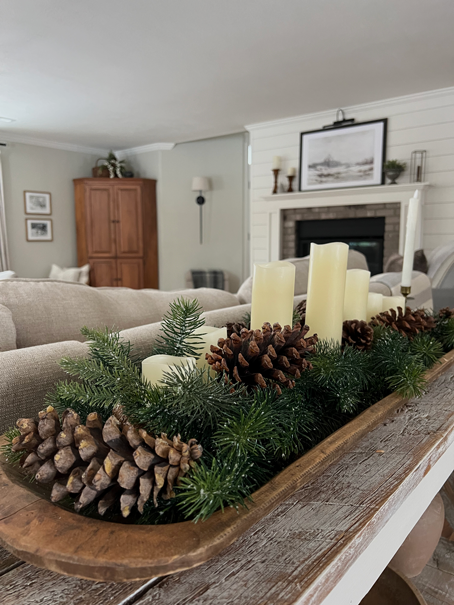
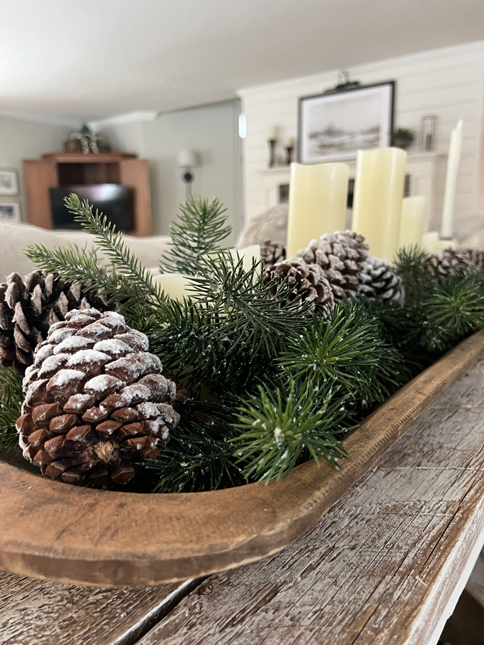
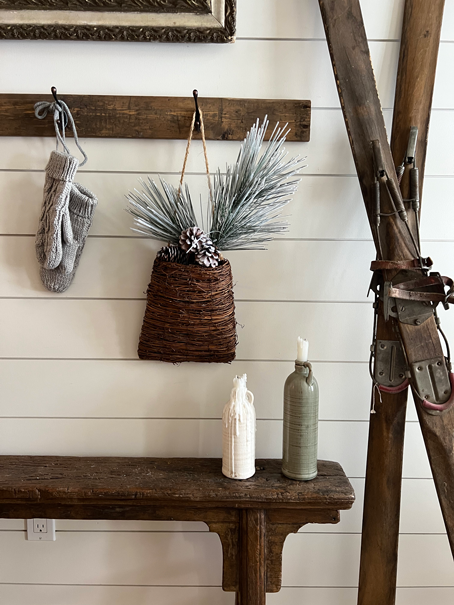
Pinecones are a classic and versatile element of winter decorating. Due to the fact, they add a natural touch to any space. There are countless ways to incorporate pinecones into your winter decor. Pinecones can be used beautifully on their own in bowls or containers. Moreover, they are beautifully paired with other natural elements, such as pine branches, winter berries, or twigs, to create a cohesive and seasonal look. Furthermore, they can adorn a dough bowl with a garland of pine branches and flameless candles. They are especially beautiful with an added touch of a frosty, snowy look.
Easy DIY Winter Frosted Pinecones
This tutorial will show two methods for creating snowy pinecones: paint and flocking. Both techniques are relatively simple and can be done with just a few supplies. Let’s get started!
Baking the Pinecones
Baking pinecones is a simple and effective way to remove insects or eggs lurking inside them. This is especially important if you plan to use pinecones indoors. After all, no one wants surprise guests crawling out of your decorations. To bake pinecones, preheat your oven to 200 degrees Fahrenheit. Then, place the pinecones on a baking sheet. Bake them for about 30 minutes or until they’re dry and fragrant. This process will kill insects or eggs hiding inside and help open up the pinecone’s scales. Open pinecone scales make for better frosting. Additionally, baking pinecones can help preserve them and extend their shelf life. Therefore, it’s a good idea to do this even if you don’t suspect that they contain any insects. Baking pinecones is an easy and effective way to ensure that your holiday or winter decorations are bug-free and ready to enjoy.
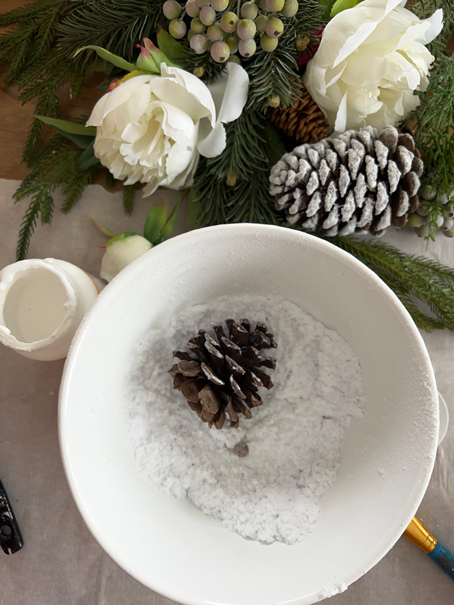
DIY Flocked Pinecones
For this method, you’ll need the following supplies:
- Pinecones (any size will do)
- Flocking (a fine, fiber-like material that gives the appearance of snow)
- Glue or Modpodge (I used Modpodge)

Apply the Flocking
Gather your pinecones and lay them out on a surface that can get messy, such as a newspaper or parchment paper.
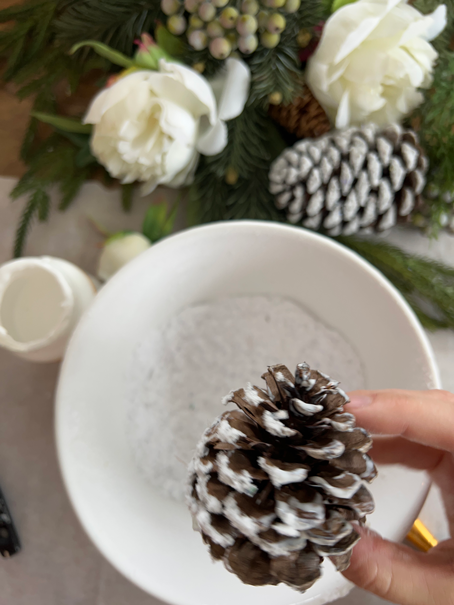
Using the adhesive, coat each pinecone evenly and cover the scales to your desired preference. Then, dip the pinecone in the flocking mix and let it stick to the adhesive.

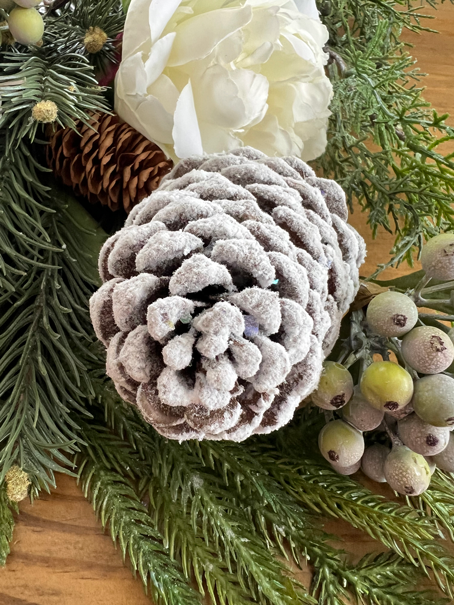
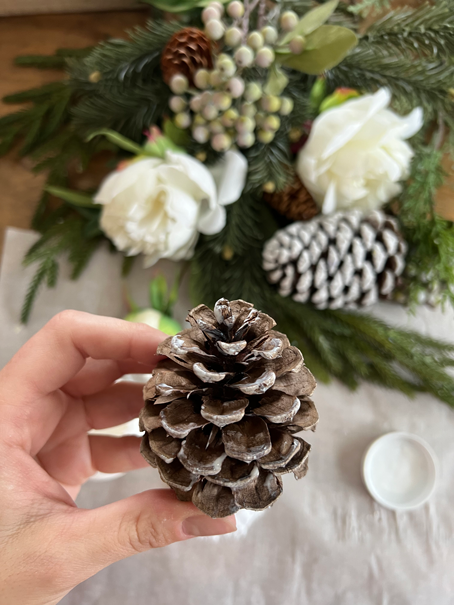
Applying more glue will produce a thicker, snowy, or frosted look. Conversely, using a light coat will create a light-frosted effect. I personally like a variety of both types. Admittedly, this is the step to let loose and forget the rules. After all, nature’s frosty touch transforms pinecones into icy masterpieces, delicately adorned with snowflakes and frost not by tutorial rules but as if by an artist’s hand. Hence, be fearless in flocking lightly or heavily, and even try flocking just the tips.
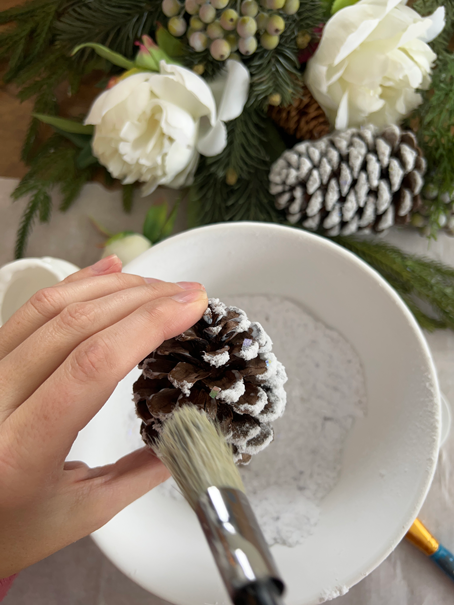
Remove the Excess
Once the adhesive is somewhat dry (which should take just a few minutes), use a dry stiff, bristled brush to remove excess flocking. Of course, this should be done gently at first. Then, the brush can be used at any desired pressure to remove any excess flocking to create the desired look. Have fun and get creative here too!
Allow the flocking to dry completely, which may take anywhere from a few hours to a full day, depending on the humidity and temperature in your home. Once the flocking is dry, your snowy pinecones are ready to use! You can display them in various ways, such as by placing them in a bowl or basket. For example, my favorite place to decorate with these beauties is a dough bowl filled with pine garland and candles. However, I also love them in simple bowls or complicated winter bouquets. Honestly, they’re pretty anywhere.
Using Paint
Another way to achieve the look is to skip the mess of traditional flocking by painting your pinecones with white paint for a hassle-free alternative. Personally, I believe the flocked method is worth the mess as it adds a more realistic texture. Still, painting is a worthy way to achieve the look.
- Pinecones (any size will do)
- White paint (we recommend a matte or satin finish for a more realistic look)
- Paintbrush
- Optional: glitter (such as silver or gold paint)
Apply the Paint
Gather your pinecones and lay them out on a surface that can get messy, like in the flocking strategy, such as a newspaper or parchment paper.
Using your paintbrush, apply a thin layer of white paint to each pinecone, making sure to cover all of the scales. Notably, the drier the brush, the lighter the paint will brush on and look more like a wisp of frost. I suggest adding layers of dry-brushed paint over globbing it on. If you’re using glitter or other decorative accents, you can also add them at this point. Finally, allow the paint to dry before adding them to your decor.
Decorating with Snowy Pinecones
Now that you’ve created your snowy and frosted pinecones, it’s time to put them to use! There are endless ways to incorporate these charming decorations into your holiday decor, and your imagination limits the possibilities. Here are a few ideas to get you started:
- Create a winter wonderland atmosphere by scattering snowy pinecones on your mantel, tabletop, or windowsill.
- Fill vases, bowls, or dough bowls for a wintery touch.
- Add natural beauty to your winter wreath by incorporating snowy pinecones.
- Create a wintery dinner table centerpiece by arranging snowy pinecones in a large bowl or vase, along with other seasonal elements such as pine branches, berries, and candles.
- Make your wintery candleholders by hot gluing snowy pinecones to the base of a candle jar or votive holder. You can place these around your home for a cozy, warm ambiance.
Winter Frosted Pinecones & Hygge
Pinecones are a natural element that can bring a sense of warmth and comfort to your home. Therefore, making them perfect for creating a cozy and welcoming atmosphere. The concept, known as hygge in Danish culture, is about creating a sense of contentment and well-being through simple pleasures and focusing on the present moment. Pinecones can be a natural and organic way to contribute to this sense of hygge, whether used as a standalone decoration or paired with other natural elements such as candles, blankets, or warm beverages. Check out my blog post on Cozy Hygge Winter Living!
Easy DIY Winter Frosted Pinecones
The natural beauty of pinecones, with their intricate patterns and textures, adds a touch of rustic charm to any space. Not to mention, the scent of pine can be comforting and inviting. Whether using pinecones to create a festive holiday display or simply enjoying them as a natural element in your winter home, they are sure to bring a sense of warmth and comfort to your space.
No matter how you use your snowy pinecones, they’re sure to add a touch of magic to your holiday season. We hope you’ve enjoyed this tutorial and that you’ll have fun creating easy DIY frosted pinecones! Happy decorating!
~Get behind the scenes of the blog by joining me on Pinterest and Instagram.~
*This post contains some affiliate links for your convenience. I make a tiny portion of the sale with no additional cost. Click here to read my full disclosure policy. Thank you for supporting this blog.*

0 Comments