

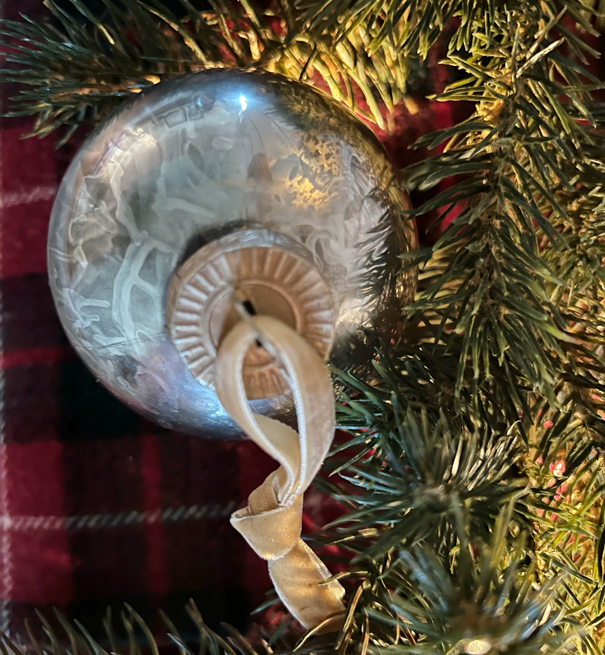
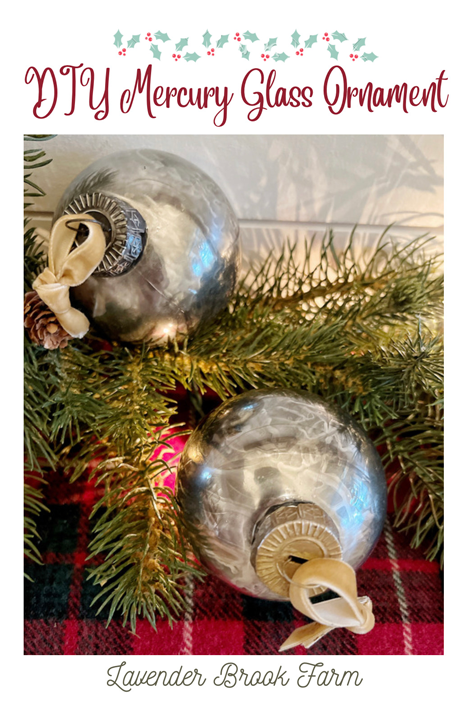
Easy DIY Mercury Glass Christmas Ornaments
Who doesn’t love an easy and inexpensive do-it-yourself project that produces an expensive look? This tutorial will show you how to DIY mercury glass Christmas ornaments in just a few quick and low-cost steps. The best part is these shatterproof ornaments look like real mercury glass at a fraction of the cost.
One of my favorite things at Christmas time is decorating the Christmas tree. I love putting up the ornaments. Each ornament is a uniquely beautiful part of a decorated Christmas tree. I especially love sentimental story-piece ornaments related to Christmases of the past. They remind me of the people and moments I treasure.
We have a family tradition with Christmas ornaments. Our family has been collecting Christmas ornaments every year since our boys were born. Now that they’re teens, we have a nice collection of ornaments they’ll be able to take with them when they’re adults. Those ornaments will have stories of each Christmas with our family behind them. Homemade or handmade ornaments are always the most special because they hold the deepest and richest memories. They carry a part of the maker with them throughout time. I love finding new and exciting ways to create timeless ornaments that hold sentimental and aesthetic value over time.
Getting Started – DIY Mercury Glass Ornaments
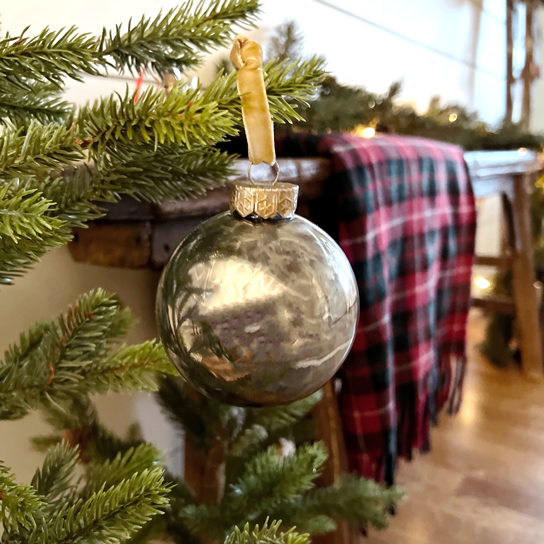
DIY mercury glass Christmas ornaments are the perfect timeless do-it-yourself ornament for the holiday season. The mercury glass look is timeless in and of itself. I collect mercury glass for one of my Christmas trees. These ornaments never lose their charm, but they can be expensive and fragile. Still, I love the way they shimmer in the warm glow of the Christmas tree lights. These shatterproof DIY faux mercury glass Christmas ornaments are the perfect solution for a hardy handmade gift with a timeless sentiment and beauty.
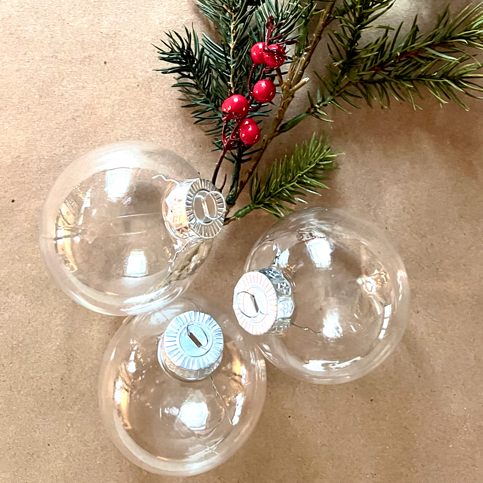
The secret behind unbreakable ornaments is in plastic craft bulbs. Good acrylic ones look just like glass, but they bounce and roll when dropped. They’re perfect for the years when little handprints roam carelessly throughout the home. They are a tried and true solution for those years with kids.
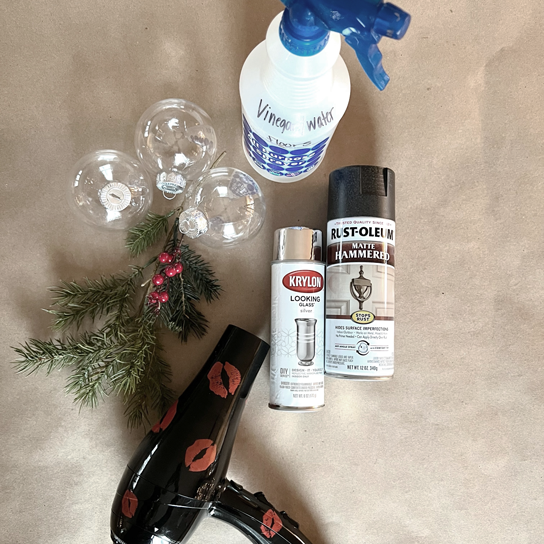
There are a few ways to handle the supplies with this do-it-yourself project. The list of needed items includes plastic or glass bulb ornaments, mirror glass spray paint, one-to-two alternative spray paint colors, vinegar water, and ribbon to hang the ornaments. Some ornaments I created have two colors, while others have three colors. Each technique produces a slightly different look which I’ll describe later.
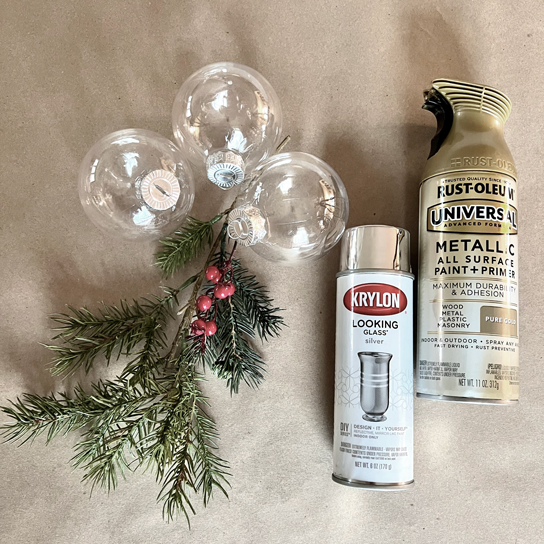

Here is the complete list of materials I used in this project:
- round plastic or glass craft ornaments
- Krylon Looking Glass spray paint
- 1 part vinegar/ 2 parts water mixture
- Rust-Oleum Metallic Gold spray paint
- Rust-Oleum Matte Hammered Black spray paint (optional)
- ribbon for hanging
- blow dryer
- paper towels
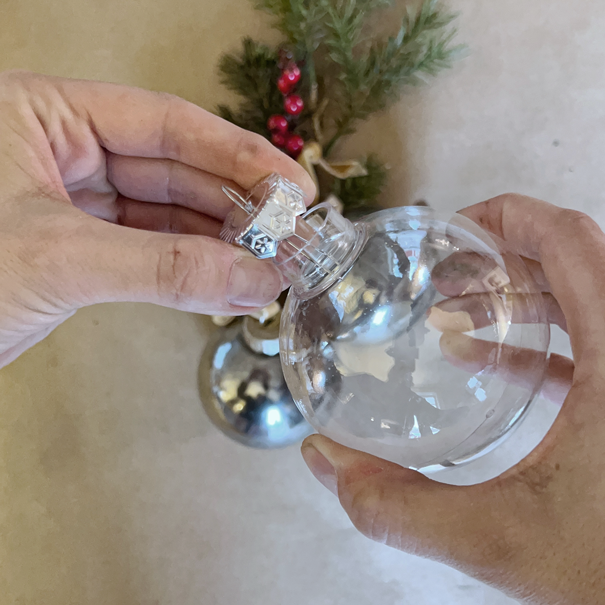
Before getting started, pinch the metal fasteners and remove the ornament caps. I poked mine into styrofoam and sprayed them with black or gold spray paint. Thus they’ll have dry time while I’m creating DIY mercury glass Christmas ornaments.
The Magic Ingredient in DIY Mercury Glass Christmas Ornaments
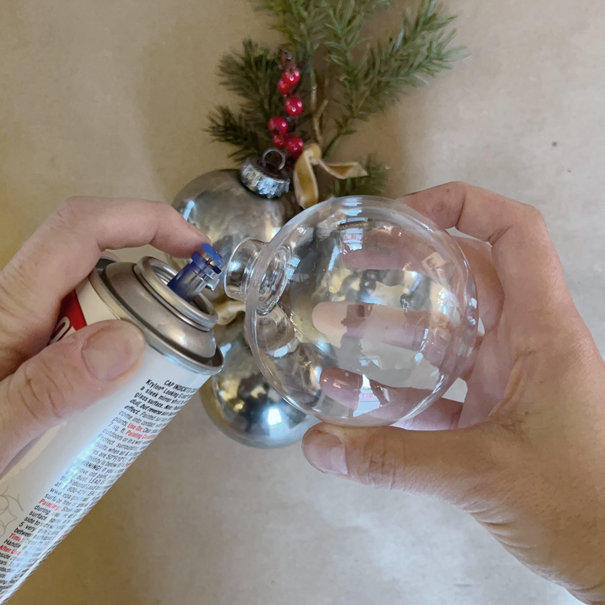
The first step is so fun! The trick behind creating mercury glass Christmas ornaments is in mirror spray. It’s remarkable to watch a mirror finish come out of an aerosol can. Nevertheless, it does, and it’s pure magic. I pointed the spray nozzle directly into the plastic bulb and gave it a 1-3 second spray. As the spray enters the ornament, it starts to liquify. At this point, I placed a paper towel over the hole and shook the bulb to distribute the paint around the inner surface. Then, I went through and repeatedly shook and turned the bulb to cover the inside surface. It was a fun and creative step. I added another coat of paint and repeated the process until the desired coating of paint covered the inside of the bulb.
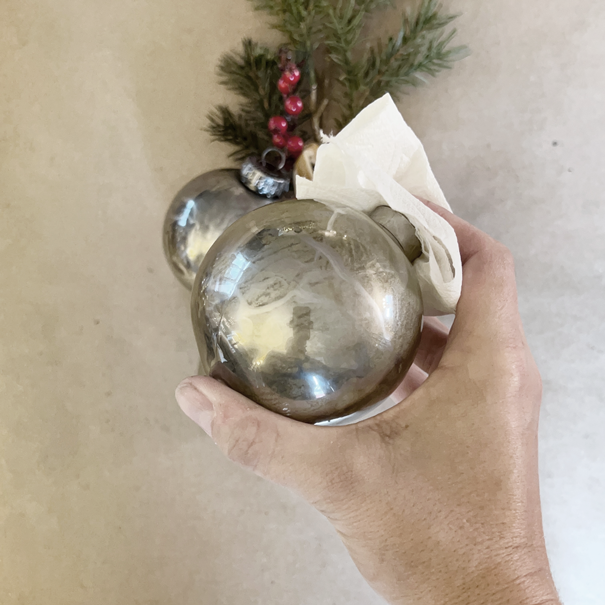
To quicken the drying time, I pointed a blow dryer into the bulb’s opening and repeated the process of turning it in all directions to move the paint desirably. The drying paint separates and becomes less evenly distributed while generating a fun opportunity to get creative in moving drying paint. There is no exact outcome, so it’s easy to get lost in watching the pigments create a unique fingerprint.
Chemistry in DIY Mercury Glass
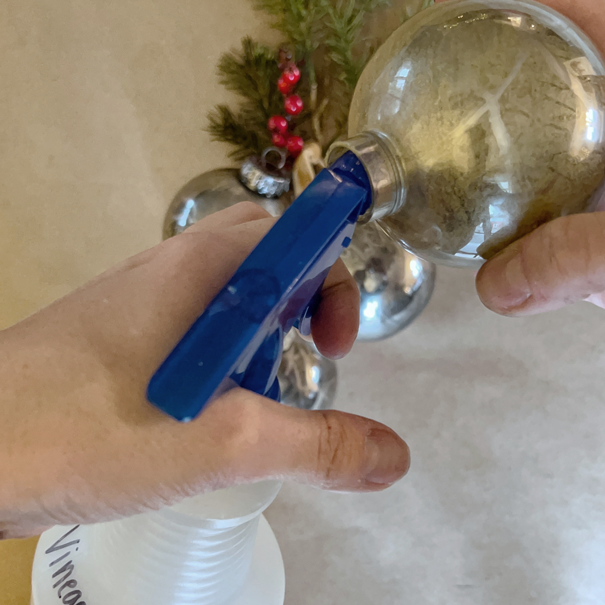
The next step includes a little chemistry experiment. Vinegar dissolves both water-based and oil-based paint, so it’s the perfect substance to create the aged silvery formula of vintage and chippy mercury glass.
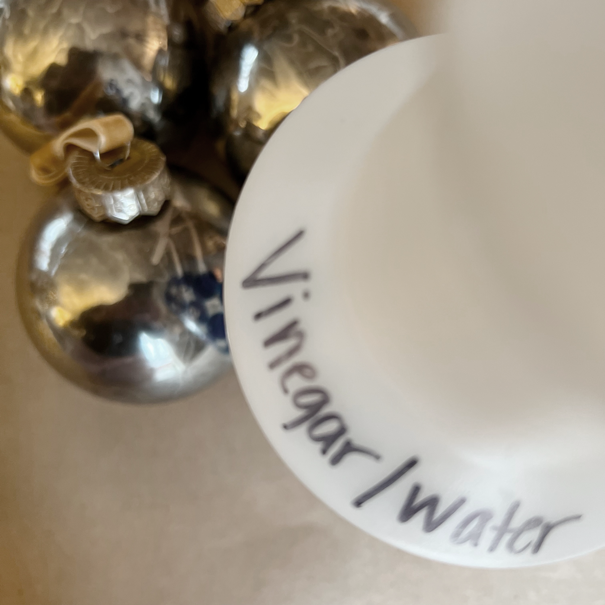
I mixed one-part vinegar with two-parts water. In all honesty, I grabbed the vinegar spray I use for cleaning, so there is no precise measurement. A few squirts of vinegar water go into the ornament. Then the bulb is shaken and turned until some of the paint dissolves or the vinegar dries. Unlike chemistry, there is no real science to this step. Letting the chemicals form a pretty look uniquely in each ornament is part of the fun.
Confession: I only choose projects that allow for creative movement. Things with precise processes drive me to madness. There is no rigidity in this do-it-yourself mercury glass ornament. It’s the best project for relaxing and letting each creation evolve into its one-of-a-kind look.
Getting Creative with DIY Mercury Glass
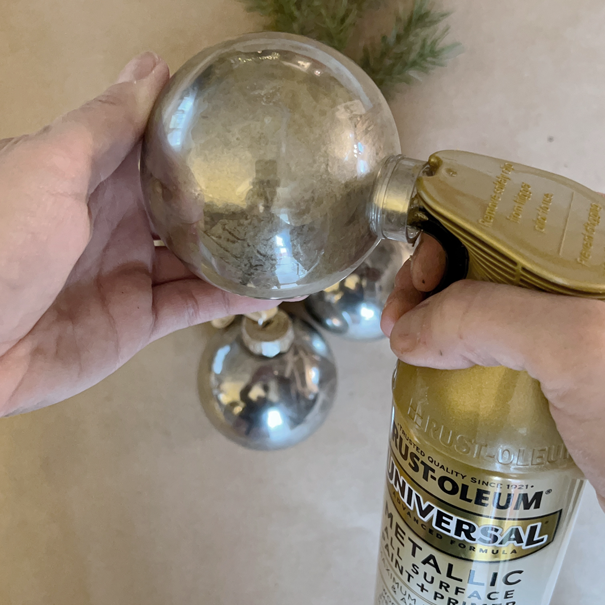
Another equally fun step comes next. This step allows for some choice and freedom of creativity. My preferences typically include subtle and soft colors and finishes. For this reason, I chose the faint contrast of metallic gold spray paint to complement the silver mirror paint. The gold spray goes into the ornament as the others did. Then, the process of shaking and rotating the ornament repeats. Starting with a less is more philosophy, I added more spray each round to get the desired look. The gold added the perfect subtle touch. The blow dryer is also handy here to quicken drying time.
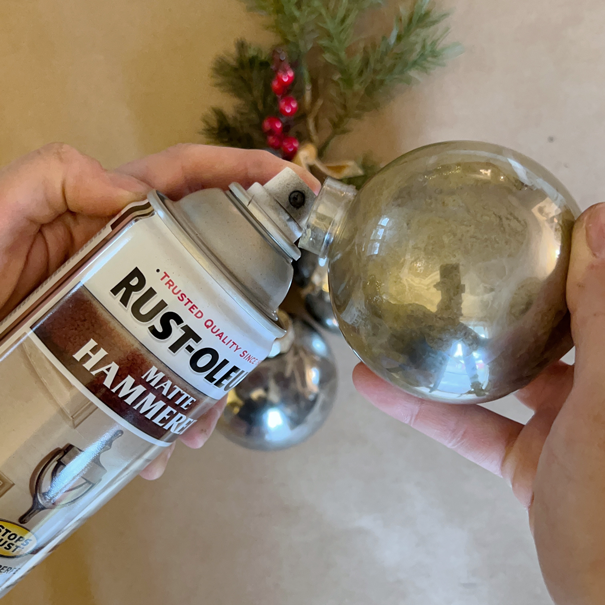
The following step is optional. The more I played and became confident in my mercury glass artistry, the more I wanted to experiment with contrast. There was an old can of matte hammered spray paint in my paint stash. Since matte hammered paint has a metallic element, I decided to try it in my holiday craft project. I followed the same spray, shake, rotate, and dry routine. The contrast of black made the gold and silver striking and gave the ornaments depth. I ended up using it in a lot of the ornaments. Realistically, I think any color combo would work on these ornaments. However, sticking with metallic-based paints is probably the safest option for keeping the reflective mercury glass look.
The Finishing Touches
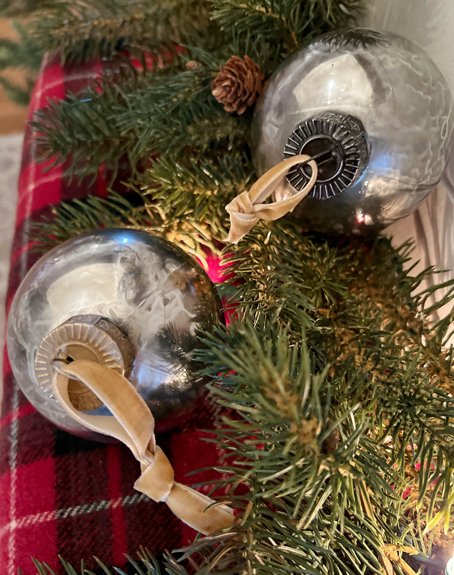
The finishing touches for this project are so rewarding. I was and still am giddy over how these beauties turned out. While the ornaments caps would look fine in their original silver or gold state, I chose to go with the dull vintage look of the spray paint. I painted some in gold and some in black. I even added Rub’ n Buff on a few. Click here to see how I transformed an antique mirror using the miracle waxy paste. It’s the perfect antiquing substance.
Christmas ornaments are such fun additions to Christmas decor. They are one of the most sentimental and best collections we can pass on through time. It’s fun knowing that something crafted with care could potentially become a traditional piece of holiday decor.
Thank you so much for joining me in this tutorial for creating a DIY mercury glass Christmas craft ornament. As always, I appreciate your presence and welcome questions or comments below.
*This post contains some affiliate links for your convenience. I make a tiny portion of the sale with no additional cost to you whatsoever. Click here to read my full disclosure policy. Thank you for supporting this blog.*
Loving DIY mercury glass inspiration? Check out Meeghan from Cali Girl in a Southern World’s stunning candleholders using the same technique.
DIY MERCURY GLASS CANDLE HOLDERS


0 Comments